
The 1960s kitchen holds a special place in American home design history. These spaces were built during an era of optimism and innovation, featuring bold colors, durable materials, and layouts designed for efficiency. However, many homeowners today find themselves living with outdated kitchens that no longer meet contemporary needs or aesthetic preferences. The good news is that transforming a 60s kitchen doesn’t require gutting the entire space or spending a fortune.
Modernizing a vintage kitchen involves strategic updates that honor the era’s quality construction while introducing contemporary functionality and style. Whether you’re dealing with harvest gold appliances, laminate countertops, or cramped layouts, thoughtful renovations can breathe new life into these time capsules. This transformation journey balances preservation and innovation, allowing you to create a kitchen that feels both fresh and respectful of its architectural heritage. The key lies in identifying which elements to update, which to preserve, and how to bridge six decades of design evolution seamlessly.
1. Assess Your Kitchen’s Architectural Bones
Before making any changes, take time to evaluate the structural elements that define your 60s kitchen. Many homes from this era feature solid construction with quality materials that have stood the test of time. Look at your cabinet boxes, wall structures, and floor plans to determine what’s worth keeping versus what needs replacement.
The 1960s prioritized functional layouts with clear work triangles connecting the sink, stove, and refrigerator. If your kitchen maintains good traffic flow and logical spacing, these bones provide an excellent foundation for modernization. Original hardwood floors hidden beneath linoleum, solid wood cabinet frames, and well-placed windows are valuable assets worth preserving and highlighting.
Consider hiring a professional inspector to assess hidden infrastructure like plumbing and electrical systems. Many 60s homes need updated wiring to handle modern appliances and lighting demands. Understanding these underlying conditions helps you budget appropriately and avoid surprises during renovation. This assessment phase prevents costly mistakes and ensures your transformation addresses both aesthetic and functional needs.
- Document existing layout with measurements and photos from multiple angles
- Check cabinet boxes for solid wood construction worth refurbishing
- Evaluate electrical capacity for modern appliances and increased outlet needs
- Inspect plumbing for outdated materials that may need replacement
- Identify original features like built-ins or tile work worth preserving
- Note natural light sources and how they can be maximized
2. Update Cabinets Without Complete Replacement
Cabinet replacement represents the largest expense in most kitchen renovations, but 60s cabinets often feature superior construction compared to modern budget options. If your cabinet boxes are solid, consider refacing or repainting instead of replacing. This approach can save thousands while delivering dramatic visual transformation.
Professional cabinet painting has evolved significantly with specialized primers that bond to laminate and wood surfaces. Choose a durable semi-gloss or satin finish in contemporary neutrals like soft white, warm gray, or navy blue. Remove dated hardware and replace with modern pulls in brushed brass, matte black, or polished nickel to instantly update the look without major construction.
For severely damaged cabinets, selective replacement offers a middle ground. Replace only the most visible upper cabinets while refurbishing lowers, or vice versa. Mix open shelving with closed storage to create visual interest and display opportunities. This hybrid approach balances budget constraints with design aspirations while maintaining the kitchen’s functional capacity.
- Remove all hardware and clean cabinets thoroughly with degreaser before painting
- Use bonding primer specifically designed for laminate or glossy surfaces
- Replace dated arch-panel doors with simple shaker-style fronts for modern appeal
- Install soft-close hinges to add contemporary convenience to existing cabinets
- Consider removing upper cabinet doors to create open shelving displays
- Add interior cabinet lighting to highlight newly painted interiors and create ambiance
3. Choose Countertops That Bridge Eras
Replacing outdated laminate countertops delivers significant visual impact for moderate investment. While 60s kitchens typically featured colorful laminate or tile, modern materials offer durability and style that complement both vintage and contemporary elements. The key is selecting finishes that don’t clash with the era’s architectural character.
Quartz countertops provide exceptional durability with minimal maintenance requirements. Choose neutral colors with subtle veining that mimics natural stone without overwhelming the space. Butcher block offers warmth and texture that pairs beautifully with painted cabinets while adding natural elements that soften modern updates. Both options resist the dated appearance of busy patterns that defined 60s design.
For budget-conscious renovations, modern laminate has evolved dramatically from its 60s predecessor. Today’s laminates mimic stone and wood with remarkable realism while offering easy installation and affordability. Consider white or light gray tones that brighten the space and provide a neutral backdrop for colorful accents in textiles and accessories.
- Extend countertops to create breakfast bars if space allows for casual dining
- Choose undermount sinks with quartz or solid surface for seamless modern look
- Add waterfall edges on islands to create contemporary architectural interest
- Select matte or honed finishes rather than high-gloss for sophisticated appeal
- Coordinate countertop color with cabinet paint for cohesive design flow
- Install thicker countertops (2-3 inches) for substantial modern presence
4. Modernize Appliances Strategically
Nothing dates a kitchen faster than harvest gold or avocado appliances from the 1960s. However, replacing all appliances simultaneously strains most budgets. Prioritize updates based on functionality and visibility, starting with the refrigerator and range as these anchor the kitchen’s visual identity.
Modern stainless steel appliances remain timeless and pair well with both traditional and contemporary design elements. Alternatively, panel-ready options allow you to match appliances to your cabinetry for a seamless built-in appearance. Black stainless, slate, or matte white finishes offer contemporary alternatives to standard stainless while accommodating various design preferences.
Consider energy-efficient models that reduce utility costs while providing superior performance. Induction cooktops, convection ovens, and smart refrigerators with flexible storage transform how you use your kitchen daily. If budget constrains a complete appliance overhaul, start with the most visible pieces and replace others as they fail or finances allow.
- Choose counter-depth refrigerators for streamlined appearance and better traffic flow
- Install over-the-range microwaves to save counter space and improve ventilation
- Select slide-in ranges rather than freestanding for integrated contemporary look
- Add under-counter refrigerator drawers for beverages to reduce main fridge congestion
- Install dishwashers with hidden controls for sleek modern aesthetic
- Consider appliance garages to hide small countertop appliances when not in use
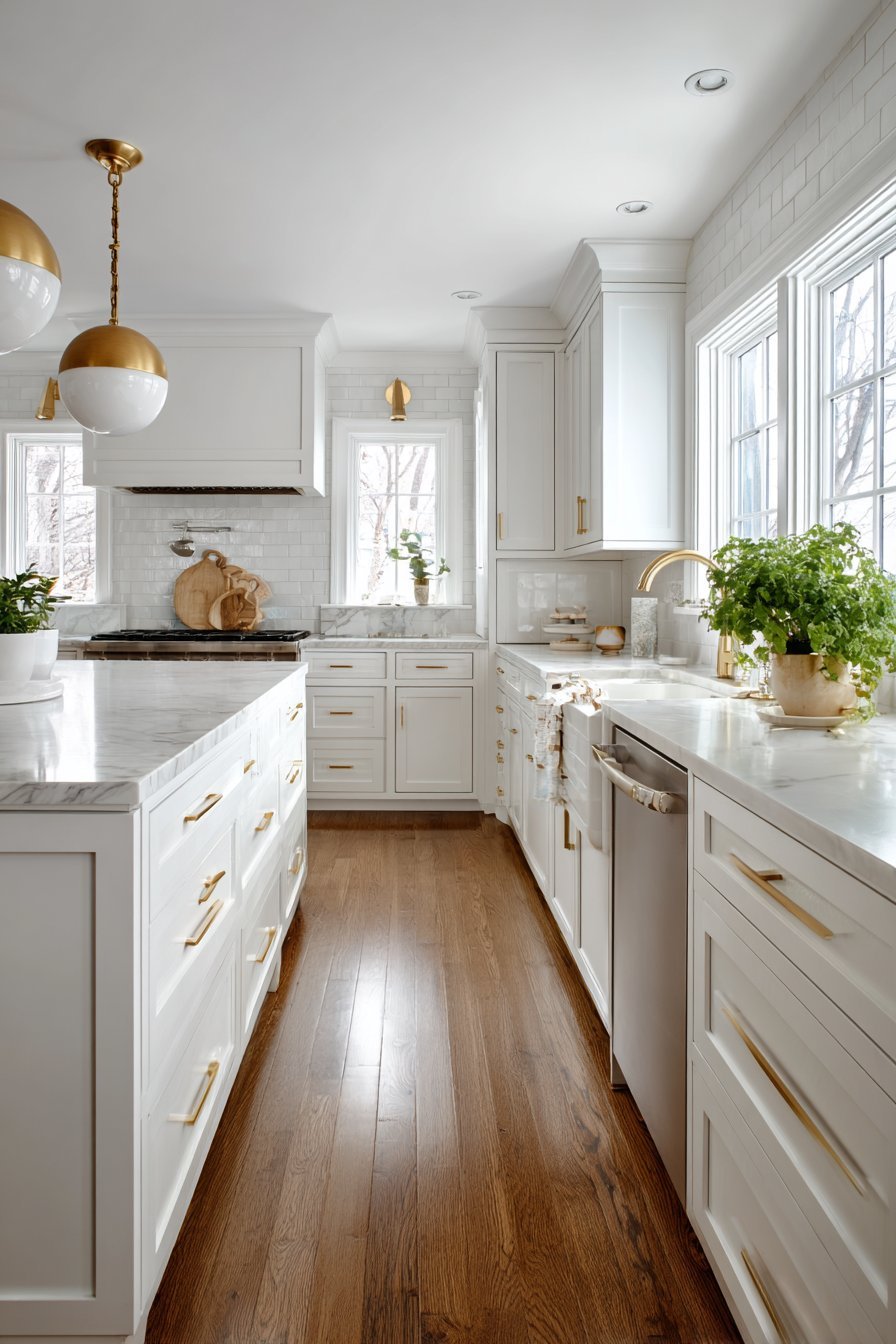
5. Transform Lighting From Functional to Fabulous
Sixties kitchens typically relied on single overhead fixtures and minimal task lighting, creating dim workspaces that feel dated and uninviting. Modern kitchen lighting employs layered illumination combining ambient, task, and accent lighting for functionality and atmosphere. This transformation dramatically impacts how your kitchen looks and functions throughout the day.
Start by replacing dated fluorescent ceiling fixtures with recessed LED cans that provide even, shadow-free illumination. Add under-cabinet lighting to brighten countertop work surfaces and eliminate shadows while creating warm ambiance during evening hours. These strips or puck lights install easily and dramatically improve task visibility during food preparation.
Statement pendant lights above islands or breakfast bars introduce personality and define specific zones within the kitchen. Choose fixtures that complement your overall design direction, whether industrial, mid-century modern, or transitional. Dimmer switches on all lighting circuits allow you to adjust brightness for various activities from bright meal prep to intimate dinner parties.
- Install at least one light fixture per 50 square feet for adequate ambient lighting
- Use LED bulbs in warm white (2700-3000K) for inviting atmosphere
- Add toe-kick lighting for subtle nighttime navigation and modern architectural detail
- Include inside-cabinet lighting to showcase glassware and create display opportunities
- Install pendant lights 30-36 inches above countertops for proper task illumination
- Consider smart lighting systems that adjust color temperature throughout the day
6. Update Flooring While Respecting Original Character
Many 60s kitchens hide beautiful hardwood floors beneath dated linoleum or vinyl tiles. Before installing new flooring, investigate whether original wood exists and can be restored. Refinished hardwood provides warmth, value, and durability that honors the home’s era while feeling timeless and contemporary.
If original floors are beyond salvation or never existed, modern luxury vinyl plank offers remarkable wood-look realism with superior water resistance and easy installation. Wide planks in light to medium tones brighten spaces and create visual flow, especially in smaller kitchens. These products resist scratches, dents, and moisture far better than period-appropriate materials.
For those committed to authentic materials, tile flooring provides endless design possibilities. Large-format porcelain tiles minimize grout lines for easier maintenance and contemporary appearance. Consider classic white subway tiles in herringbone pattern or geometric designs that nod to 60s style without feeling dated. Heated floors add luxury that transforms morning routines during cold months.
- Choose flooring that extends into adjacent spaces for visual continuity and flow
- Install wider planks (6-8 inches) for modern proportions and fewer seams
- Select matte or low-gloss finishes that hide scratches and feel more natural
- Ensure proper subfloor preparation to prevent squeaks and premature wear
- Add comfortable anti-fatigue mats at sink and cooking zones for practical comfort
- Consider darker grout with light tile for definition without maintenance headaches
7. Refresh Walls and Backsplashes With Contemporary Materials
Sixties kitchen walls often feature wallpaper borders, busy patterns, or dated paint colors that overwhelm the space. Fresh paint in contemporary neutrals instantly modernizes while providing a clean backdrop for furniture, accessories, and artwork. Choose colors with warm undertones like greige, soft white, or pale sage that complement rather than compete with other elements.
The backsplash presents an opportunity for personality and protection without major investment. Classic white subway tile remains eternally stylish and pairs beautifully with any cabinet color or countertop material. For more drama, consider geometric cement tiles, marble slabs, or glass mosaics that catch light and add visual interest to your most-viewed wall surface.
Modern backsplash materials extend full-height to cabinets rather than stopping at traditional 18-inch heights, creating dramatic visual impact and easier cleaning. This approach eliminates the painted wall band that can look dated while protecting walls from splashes and grease. Coordinate backsplash materials with countertops for cohesive design that feels intentional and professionally executed.
- Paint walls before installing new backsplash to simplify the process and protect new tile
- Choose backsplash materials that coordinate with rather than match countertops exactly
- Extend backsplash behind the range up to the hood for dramatic focal point
- Consider peel-and-stick tile options for budget-friendly temporary transformations
- Use contrasting grout colors to emphasize tile patterns and add visual interest
- Install outlets within backsplash area rather than breaking tile for cleaner appearance
8. Improve Storage and Organization Systems
Decade-old cabinets often lack the interior organization that makes modern kitchens functional. Deep base cabinets become black holes where items disappear, while fixed shelves waste vertical space. Adding contemporary storage solutions transforms how efficiently you use existing square footage without expanding the kitchen’s footprint.
Install pull-out shelving in base cabinets to access items easily without crawling inside. Lazy Susans in corner cabinets maximize awkward spaces while making every item visible and reachable. Drawer dividers, spice rack inserts, and vertical tray storage transform chaotic cabinets into organized systems that actually work with your cooking habits and lifestyle.
Consider removing a few cabinet doors to create display areas for attractive dishes, glassware, or cookbooks. This approach adds visual lightness while forcing you to maintain organization in visible areas. Combine open and closed storage for balance between accessibility and concealment, creating a kitchen that feels both functional and thoughtfully designed.
- Add pull-out trash and recycling bins to eliminate freestanding containers
- Install vertical dividers in cabinets for storing baking sheets and cutting boards
- Use drawer inserts with adjustable compartments for utensils and gadgets
- Add hooks inside cabinet doors for measuring cups and pot holders
- Install roll-out shelves in pantry cabinets for complete visibility of all items
- Consider appliance garages with tambour doors for countertop appliance storage
9. Create a Cohesive Color Palette
Successful kitchen transformations rely on intentional color choices that unify disparate elements into coherent design. Start with a neutral base for cabinets, walls, and countertops, then layer in accent colors through accessories, textiles, and small appliances. This approach allows flexibility to update the look seasonally without major renovation.
The 60-30-10 rule provides foolproof color distribution: 60% dominant color (typically cabinets and walls), 30% secondary color (countertops, flooring, larger accessories), and 10% accent color (hardware, textiles, small décor items). This formula creates visual balance while preventing color overload that quickly dates a space.
Choose a consistent metal finish for all hardware, faucets, and light fixtures to create cohesion throughout the space. Mixing metals can work beautifully when done intentionally, but matching finishes provides the easiest path to professional-looking results. Brushed gold, matte black, and polished nickel currently dominate modern kitchens while remaining timeless enough to endure trend cycles.
- Test paint colors on large poster boards in different lighting conditions before committing
- Limit your palette to three main colors plus neutrals for sophisticated restraint
- Choose one statement element (bold backsplash or colorful cabinets) and keep other elements neutral
- Coordinate window treatments with your overall color scheme for visual flow
- Select small appliances in colors that complement your palette rather than clash
- Use natural materials like wood and stone to add warmth without additional color
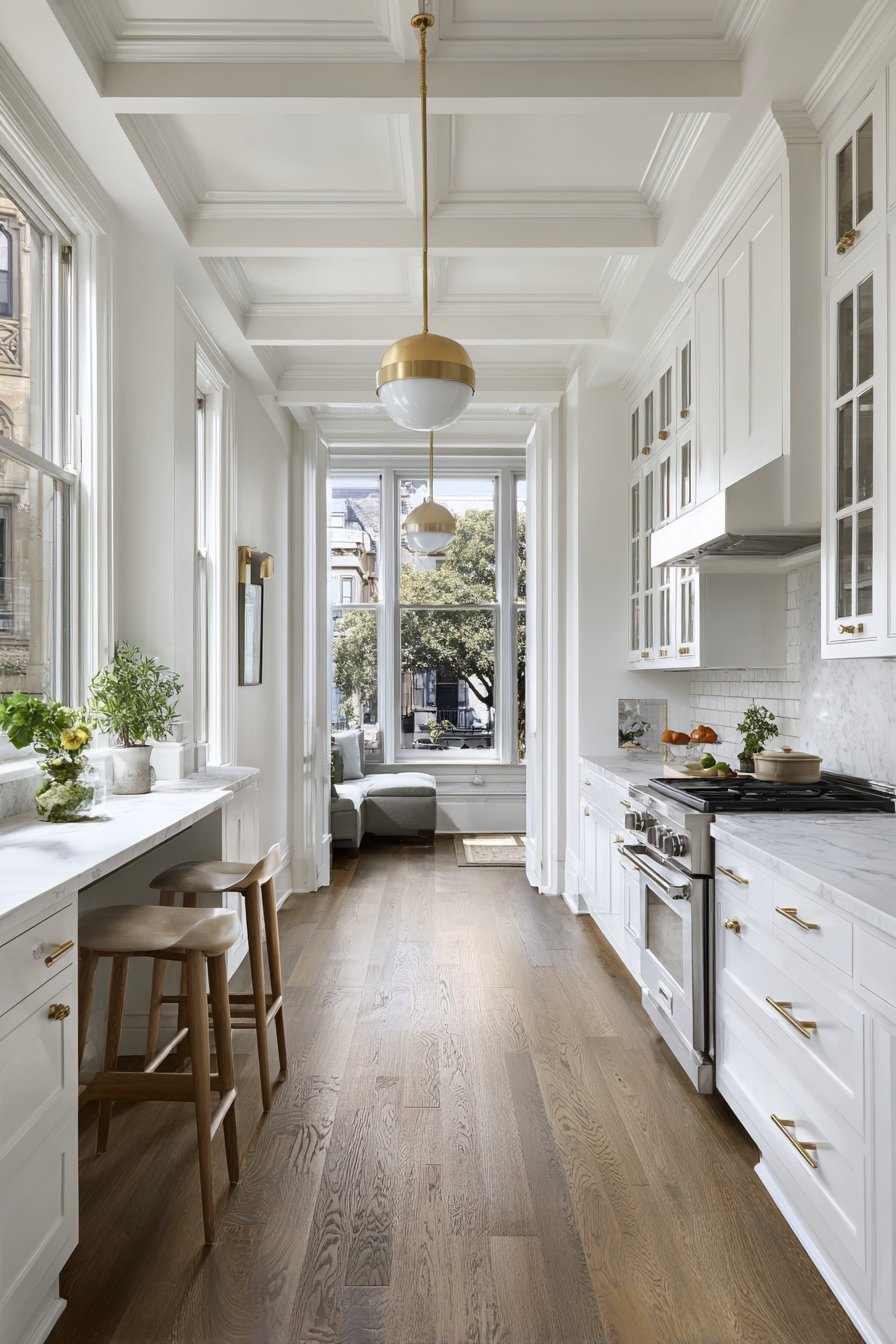
10. Add Finishing Touches That Personalize the Space
After addressing major structural updates, thoughtful details complete the transformation and make the kitchen uniquely yours. These finishing touches cost relatively little but significantly impact how the space feels and functions daily. Consider elements that enhance both beauty and practicality for a kitchen that truly serves your household’s needs.
Introduce living elements like potted herbs on windowsills or hanging plants that bring life and freshness to the space. These natural accents soften hard surfaces while providing ingredients for cooking. Select containers that complement your design aesthetic, whether ceramic, metal, or woven baskets that add textural interest.
Invest in quality textiles including dish towels, pot holders, and a kitchen rug that introduce color, pattern, and warmth. These easily updated items allow you to refresh the look seasonally without permanent commitment. Choose durable, washable materials that withstand kitchen use while contributing to the overall design scheme you’ve carefully created.
- Display attractive cookware and utensils on open shelving or hanging racks
- Add artwork or floating shelves with personal collections to inject personality
- Install a pot filler faucet at the range for cooking convenience and luxe appeal
- Include a small seating area if space allows for casual meals and conversation
- Add fresh flowers or fruit in attractive bowls as colorful, changeable focal points
- Install open shelving at window areas to display plants and let in maximum light
Conclusion
Transforming a 60s kitchen into a modern, charming space requires strategic thinking rather than unlimited budgets. By focusing on high-impact updates like cabinets, countertops, and lighting while preserving quality architectural elements, you can create a kitchen that honors its heritage while meeting contemporary needs. The key lies in making intentional choices that balance preservation with innovation.
Start with thorough assessment, prioritize updates based on visual impact and functionality, and phase projects according to your budget and timeline. Remember that successful renovations happen gradually, allowing you to live with changes and adjust plans as needs evolve. Your transformed kitchen will serve as the heart of your home, combining the best of 1960s craftsmanship with modern convenience and style for decades to come.