
Square kitchens present unique opportunities for creating highly functional and organized spaces. Unlike galley or L-shaped layouts, a square kitchen offers equal wall space on all sides, allowing for balanced storage distribution and efficient workflow patterns. The key to success lies in understanding how to leverage every inch of available space while maintaining an open, uncluttered aesthetic that makes cooking and entertaining enjoyable.
Maximizing storage in a square kitchen requires strategic planning that considers both vertical and horizontal dimensions. From corner solutions to overhead cabinets, each area demands thoughtful consideration to ensure accessibility and functionality. Whether you’re working with a compact 10×10 layout or a more spacious 15×15 design, the principles of smart storage remain consistent: utilize every surface, prioritize frequently used items, and create systems that simplify daily routines.
This comprehensive guide explores ten proven strategies for transforming your square kitchen into a storage powerhouse without sacrificing style or comfort. You’ll discover practical solutions for corner dilemmas, creative ways to expand cabinet capacity, and innovative approaches to organizing everything from pantry staples to specialty cookware. These techniques work across various design styles and budget ranges, making efficient storage accessible to every homeowner.
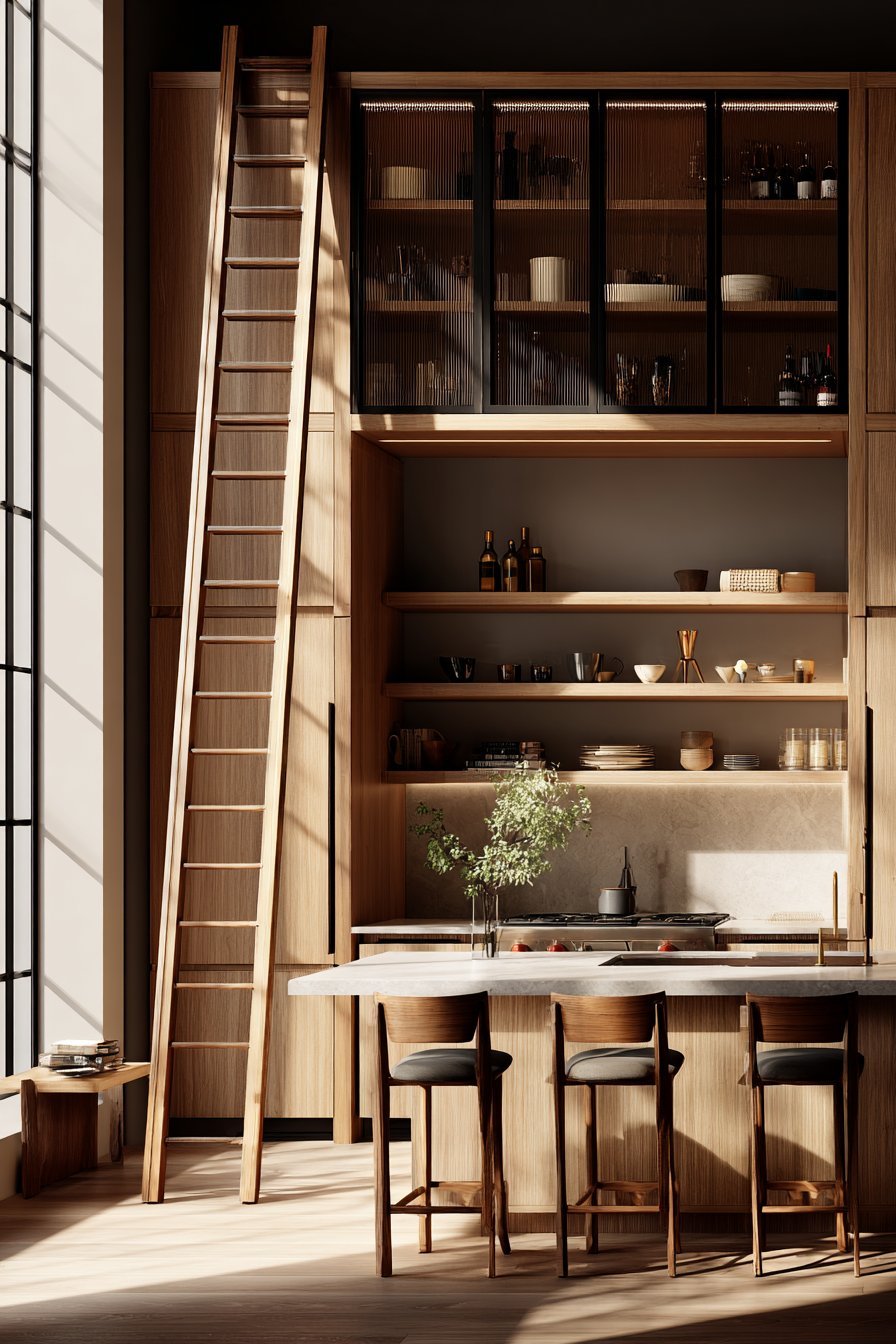
1. Install Floor-to-Ceiling Cabinetry
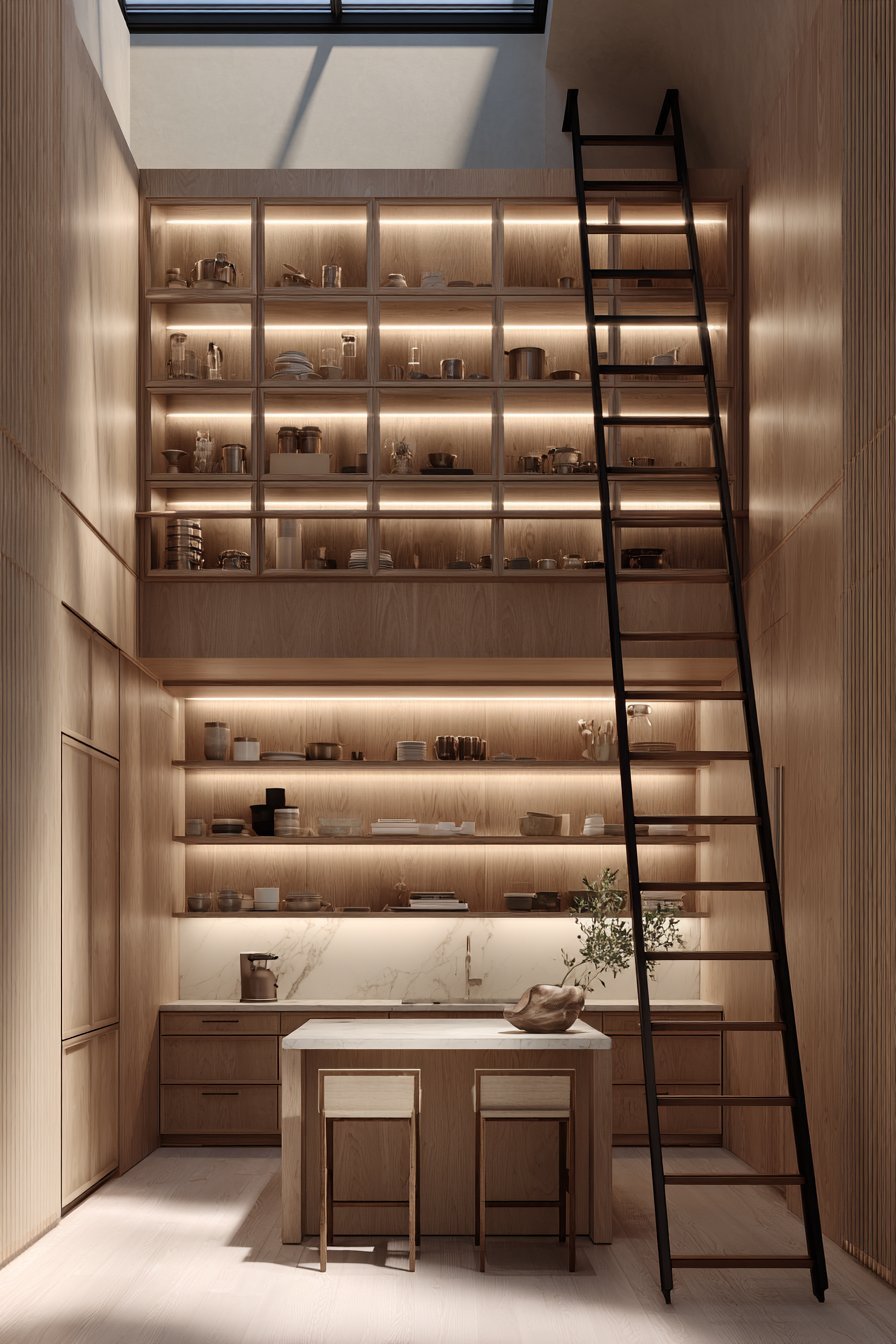
Floor-to-ceiling cabinets represent one of the most effective ways to maximize vertical space in square kitchens. Traditional cabinet installations often leave 12-18 inches of unused space between the cabinet tops and ceiling, creating dust-collecting gaps that waste valuable storage potential. By extending cabinetry to the ceiling, you gain substantial storage for seasonal items, serving pieces, and rarely used appliances while creating a custom, built-in appearance that elevates the entire room’s aesthetic.
The upper portions of tall cabinets work perfectly for storing items you access infrequently, such as holiday dishware, large serving platters, or specialty baking equipment. This strategic placement keeps these items out of prime real estate while remaining accessible when needed. Consider installing pull-down shelving systems in the highest cabinets to improve accessibility without requiring a step stool for every retrieval.
When implementing floor-to-ceiling storage, ensure proper weight distribution and use quality hardware designed for taller installations. The visual impact of extended cabinetry makes square kitchens feel more cohesive and intentionally designed, particularly when cabinet finishes complement your overall color scheme and architectural details.
- Choose lighter cabinet colors for tall installations to prevent the space from feeling enclosed
- Install LED strip lighting under upper cabinets to illuminate work surfaces effectively
- Use glass-front doors on higher cabinets to reduce visual weight and showcase decorative items
- Incorporate a library ladder or stylish step stool for safe access to top shelves
- Plan upper cabinet contents before installation to ensure appropriate shelf spacing
- Consider motorized lift systems for frequently accessed items stored high
2. Optimize Corner Cabinet Solutions
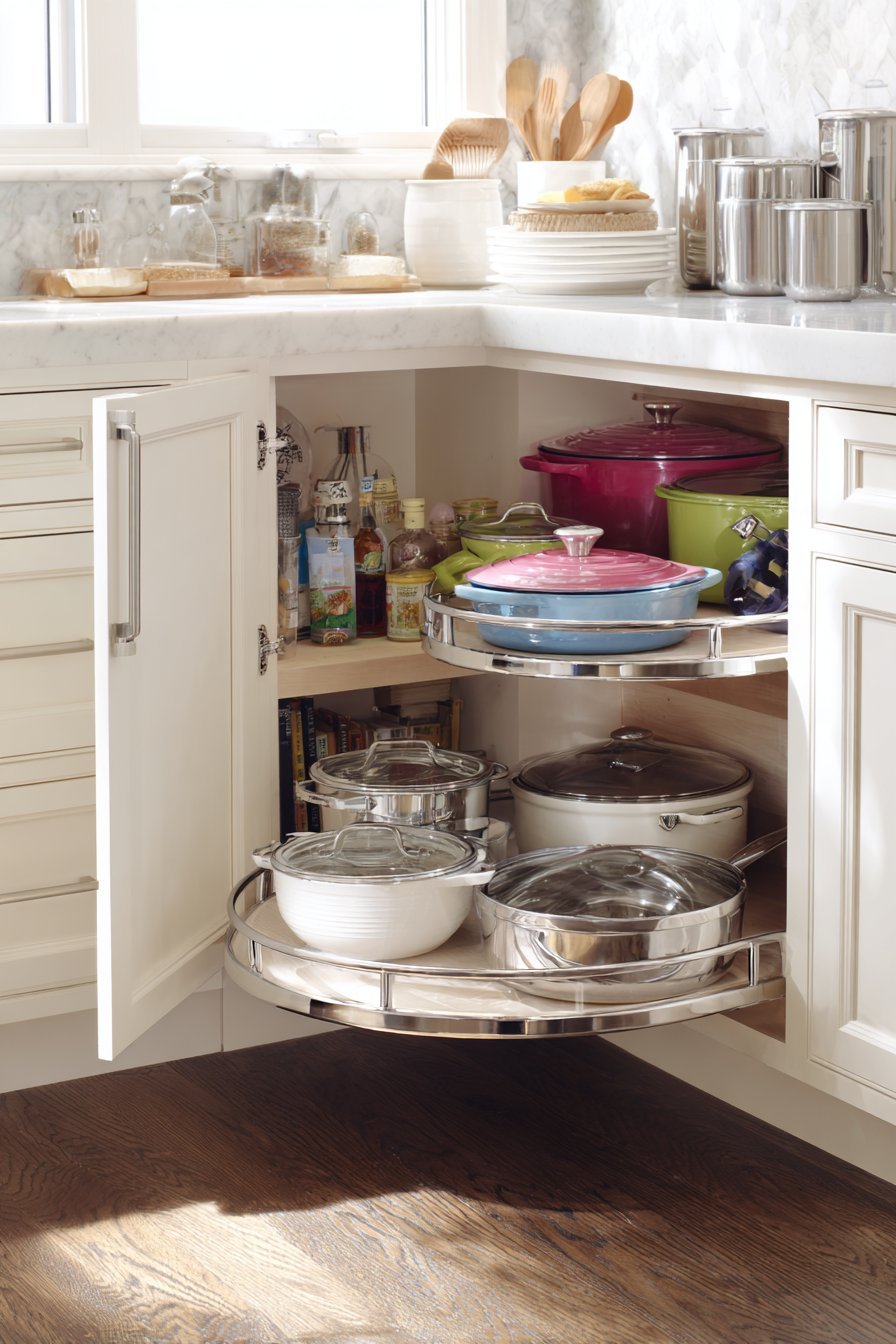
Corner cabinets in square kitchens often become black holes where items disappear into inaccessible depths. Traditional corner cabinets waste approximately 50% of their potential storage capacity due to poor accessibility and awkward angles. Modern corner solutions transform these challenging spaces into highly functional storage areas that make every item easily retrievable and visible, eliminating frustration during meal preparation.
Lazy Susan turntables offer the most popular corner solution, allowing full rotation to access items stored around the cabinet’s perimeter. For deeper corners, consider super lazy Susan systems that feature two independent rotating trays, maximizing usable space while maintaining excellent accessibility. These systems work particularly well for storing cookware, small appliances, or pantry staples that you need to reach quickly during cooking.
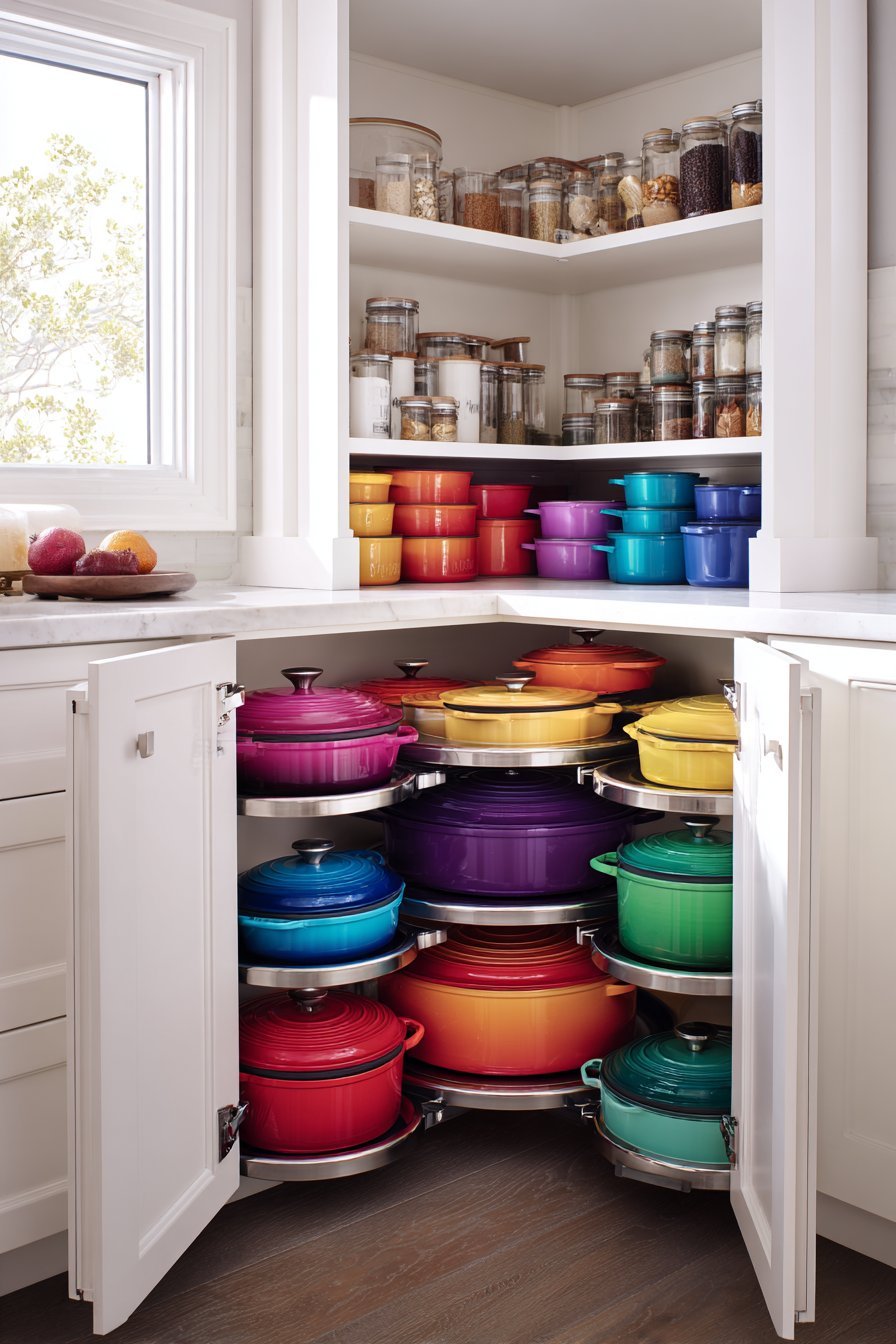
Pull-out corner drawer systems represent another excellent option, featuring specially designed drawers that extend fully from the cabinet opening. These systems provide superior visibility compared to traditional shelves and prevent items from being forgotten in rear corners. Magic corner units and LeMans corner systems offer premium solutions with swing-out shelving that brings items forward automatically when doors open.
- Measure corner cabinet dimensions carefully before selecting hardware systems
- Install pull-out systems at comfortable heights between 24-48 inches from floor
- Use corner spaces for items you access regularly to maximize convenience
- Combine lazy Susan bases with pull-out systems in upper corner cabinets
- Add LED motion-sensor lights inside corner cabinets for improved visibility
- Reserve one corner for a specialized wine rack or beverage station
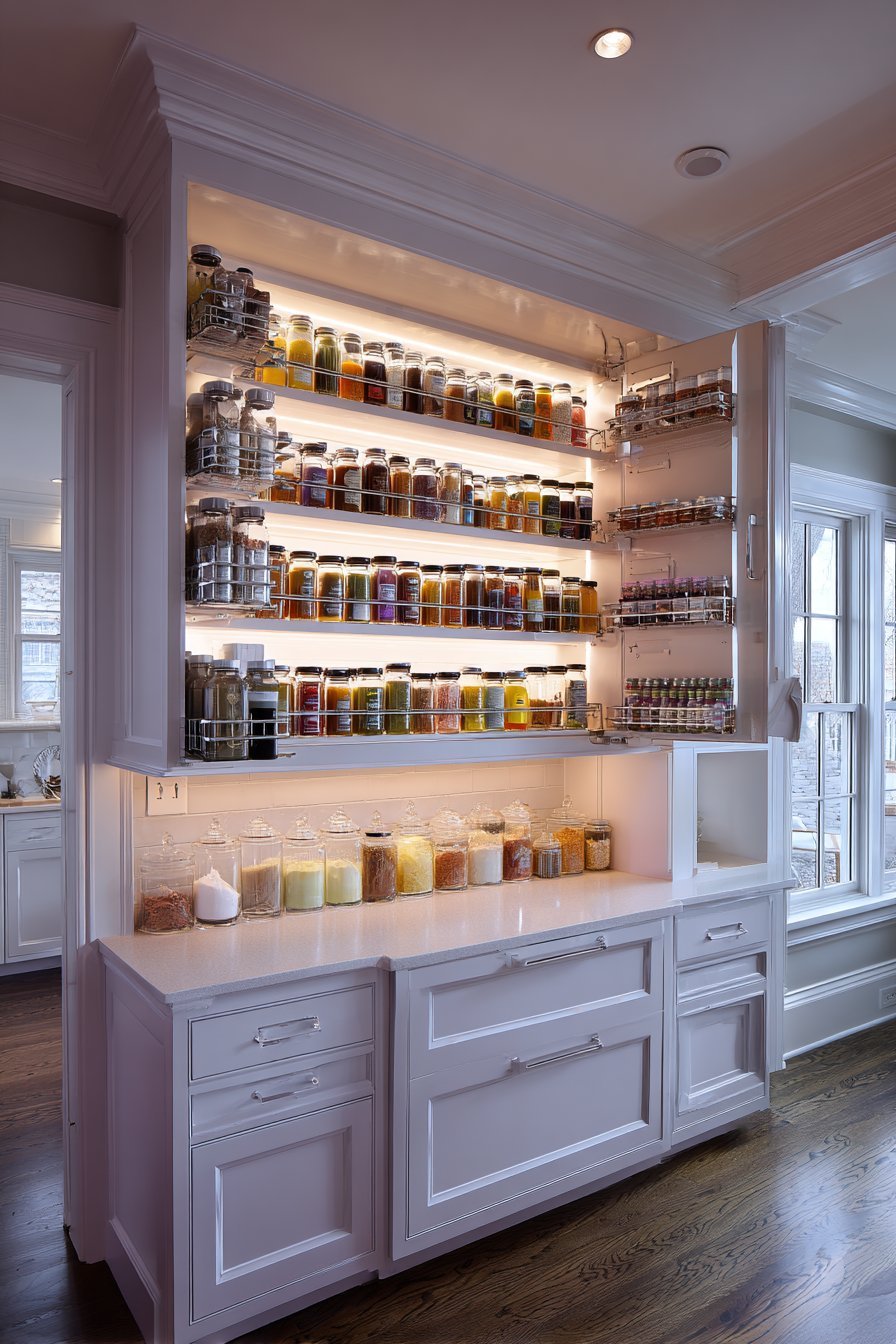
3. Add Pull-Out Pantry Systems
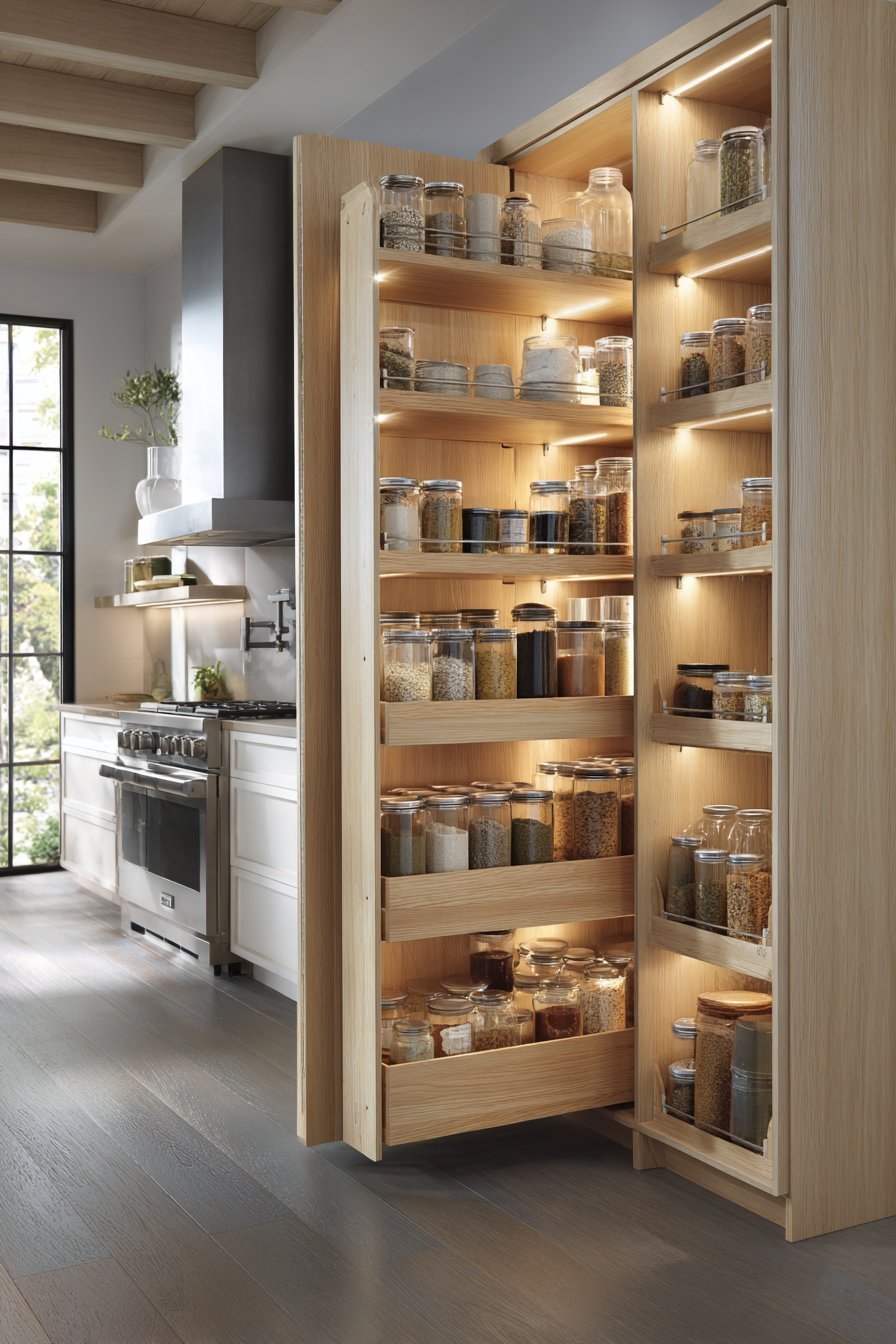
Pull-out pantry systems transform narrow gaps and standard cabinet spaces into high-capacity storage areas that keep ingredients organized and visible. These vertical storage solutions typically range from 6 to 12 inches wide, fitting into spaces that would otherwise remain unused or house only single rows of items. Full-extension drawer slides allow complete access to every shelf level, making it easy to see inventory at a glance and preventing items from expiring unseen at the back of deep shelves.
Tall pull-out pantries work exceptionally well along the perimeter of square kitchens, particularly in spaces between appliances or at the end of cabinet runs. These units can store everything from canned goods and dry ingredients to spices and cooking oils in dedicated sections with adjustable shelving that accommodates items of varying heights. The organized visibility reduces duplicate purchases and streamlines meal planning.
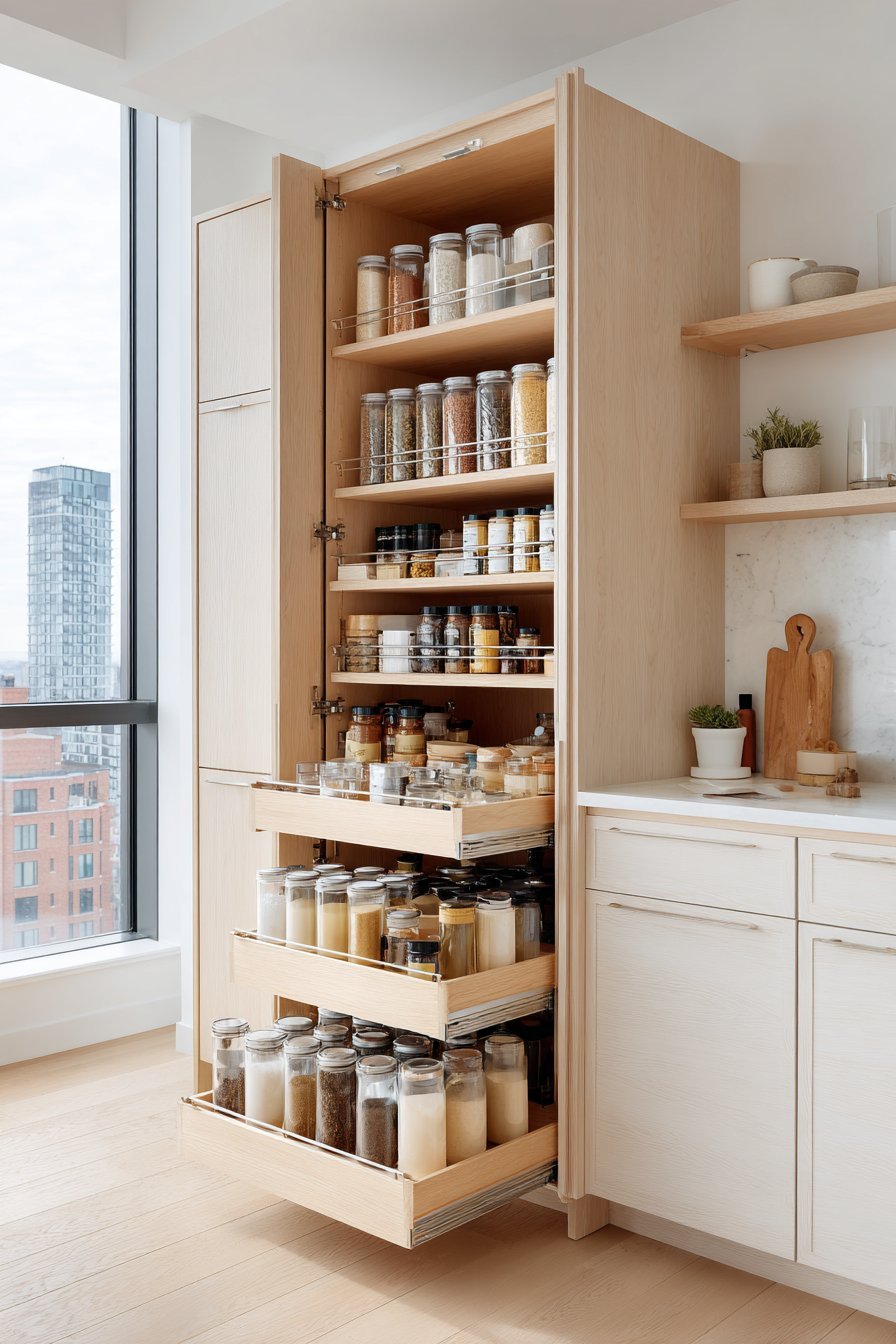
Consider installing multiple pull-out pantries in different zones of your square kitchen to create specialized storage areas. One unit might hold baking supplies while another houses breakfast items and snacks. This zoned approach reduces congestion during cooking and allows multiple people to work in the kitchen simultaneously without interfering with each other’s tasks.
- Install soft-close mechanisms to prevent slamming and extend hardware life
- Use clear storage containers on pull-out shelves for better visibility
- Add shelf risers or tiered organizers to maximize vertical space within pantries
- Place frequently used items at eye level for easiest access
- Install pull-out spice racks on the inside of cabinet doors for additional storage
- Consider illuminated pull-out systems with integrated LED lighting
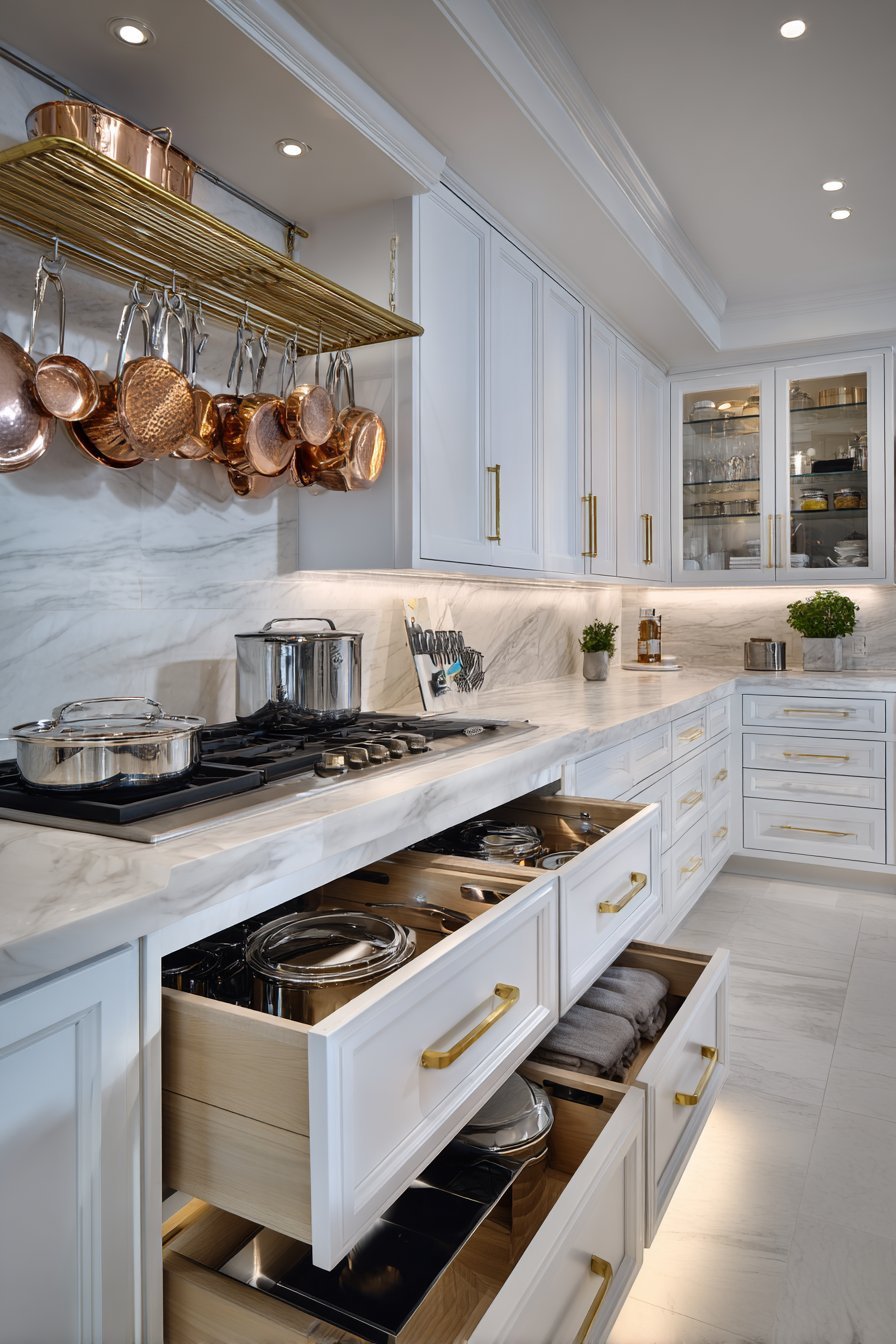
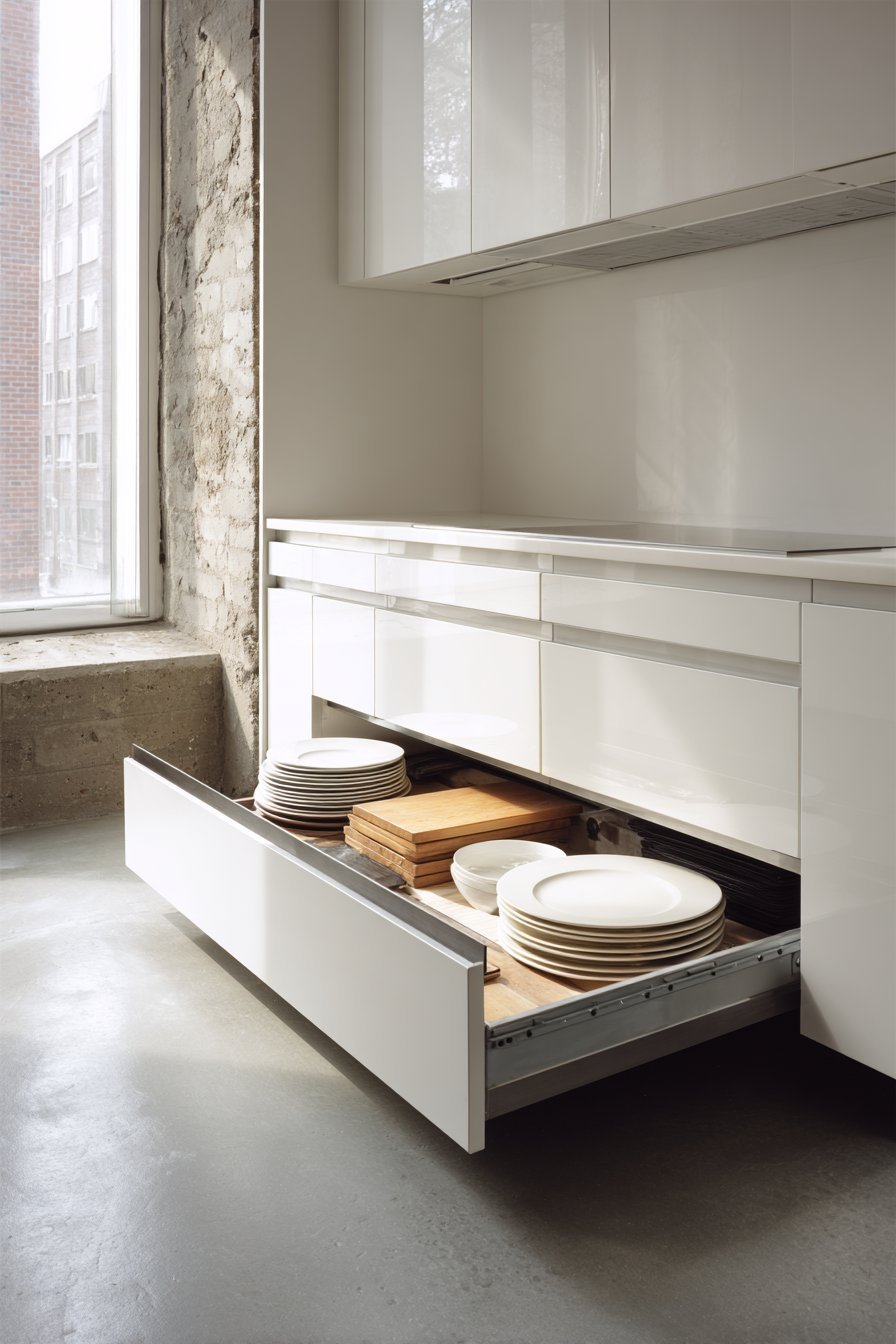
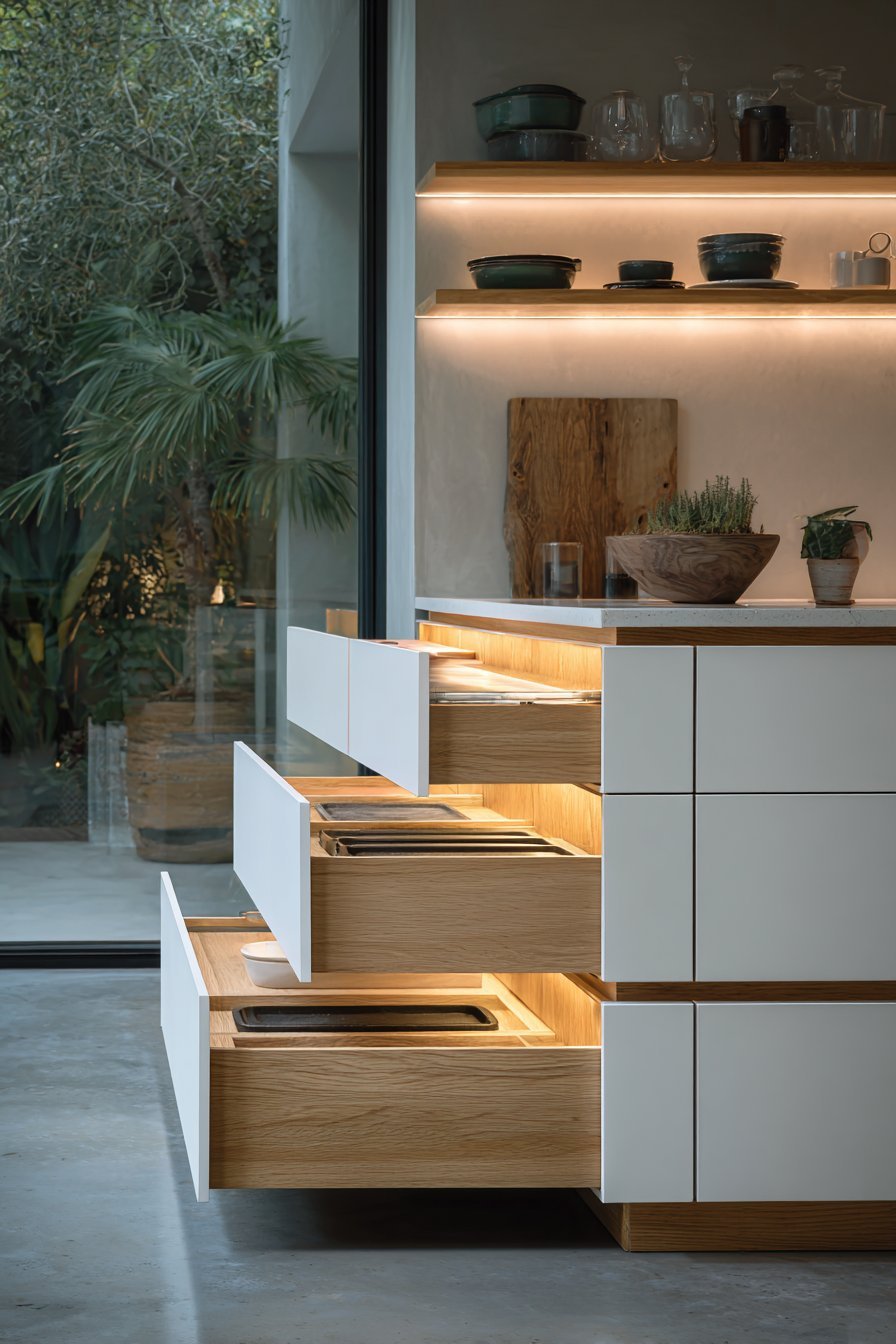
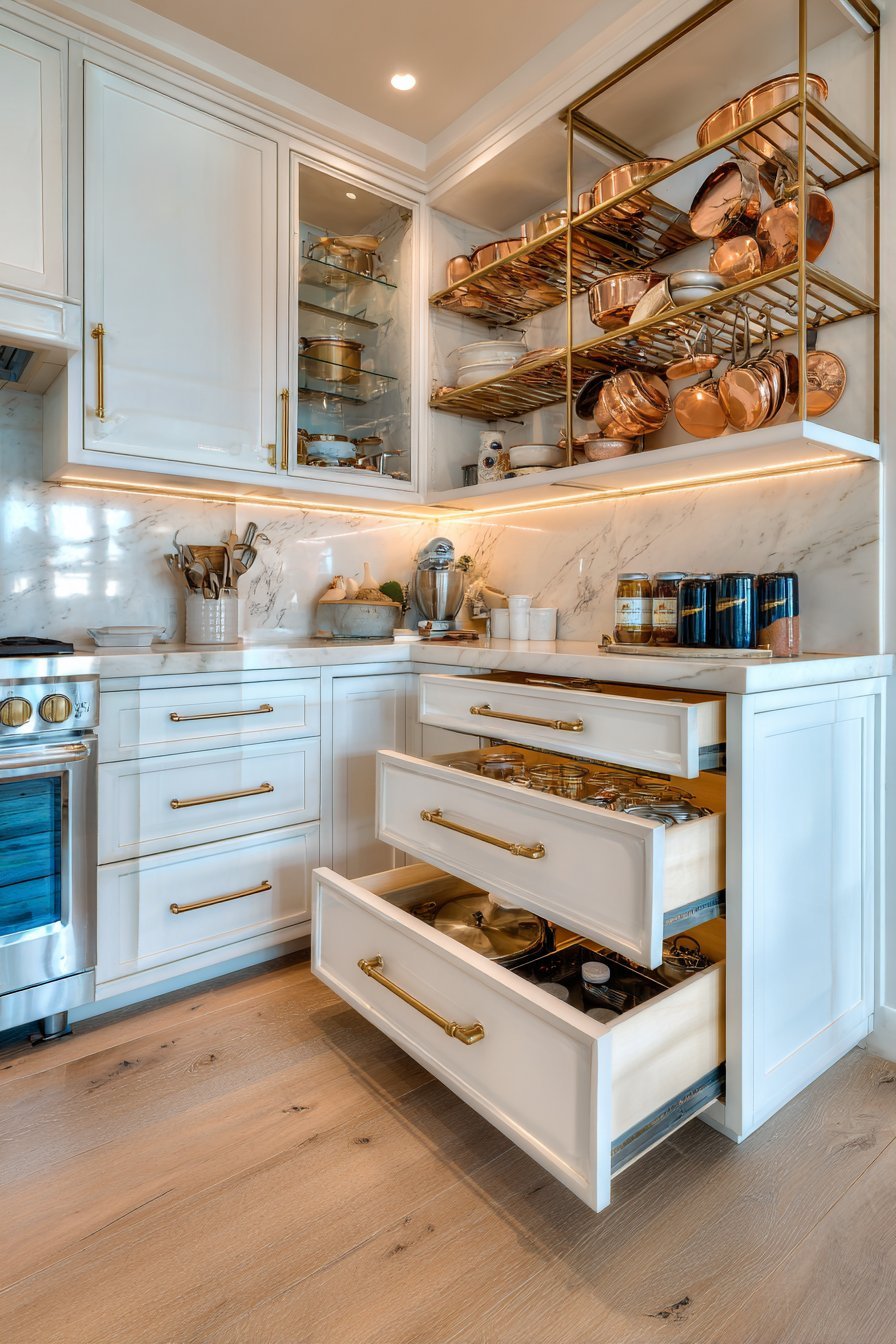
4. Utilize Deep Drawer Storage
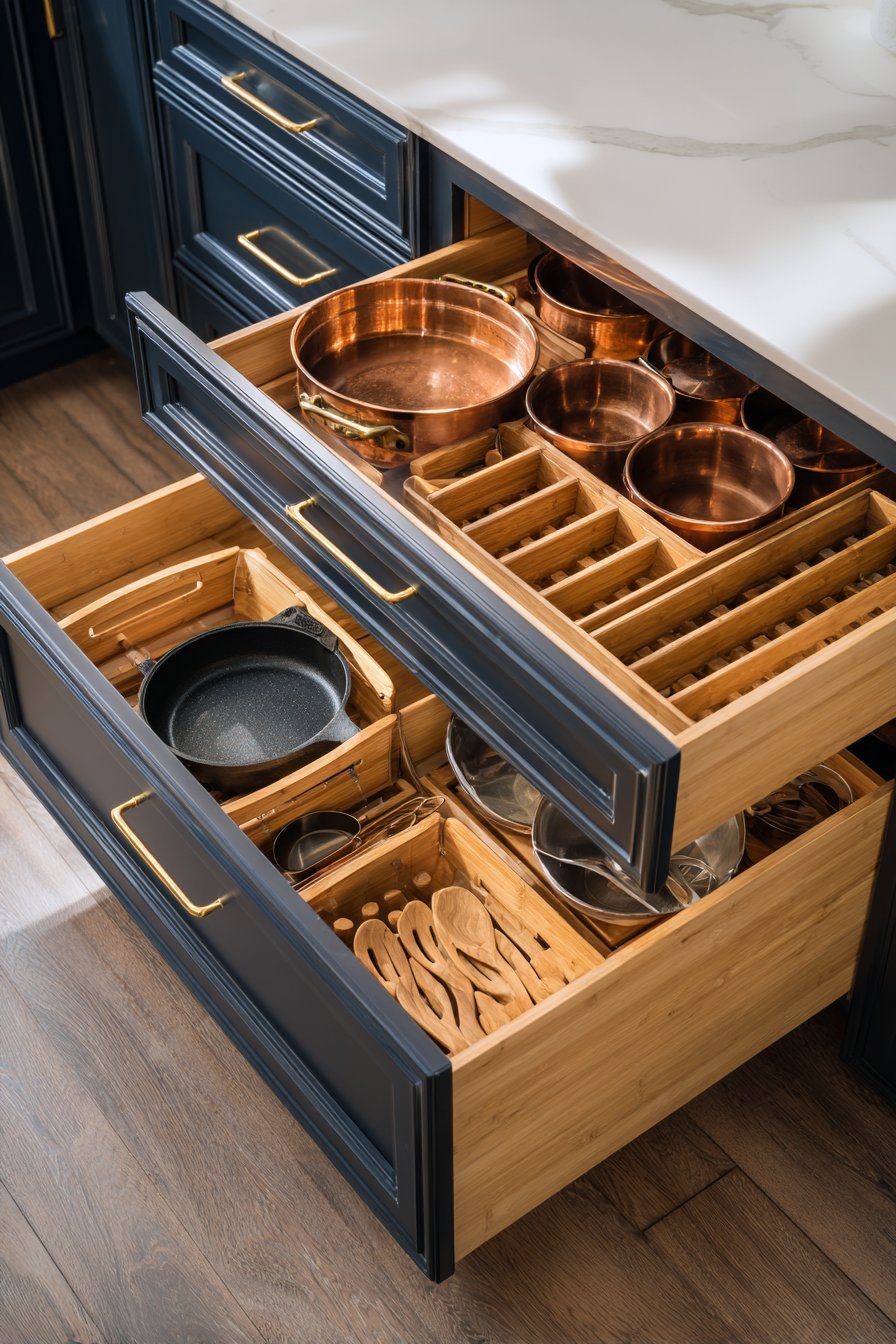
Deep drawers offer superior organization compared to traditional cabinets with shelves, particularly for pots, pans, and bulky kitchen items. Drawers eliminate the need to bend and reach into dark cabinet depths, bringing contents forward for easy visibility and access. Modern drawer systems can support substantial weight when properly installed, making them ideal for storing cast iron cookware, small appliances, and even canned goods in organized arrangements.
Organizing deep drawers requires thoughtful use of dividers, inserts, and compartmentalized systems that prevent items from shifting during opening and closing. Peg systems allow customizable configurations that adapt as your storage needs evolve, while dedicated plate holders and pan organizers keep items separated and protected. This organization level reduces damage to cookware finishes and makes finding specific items quick and effortless.
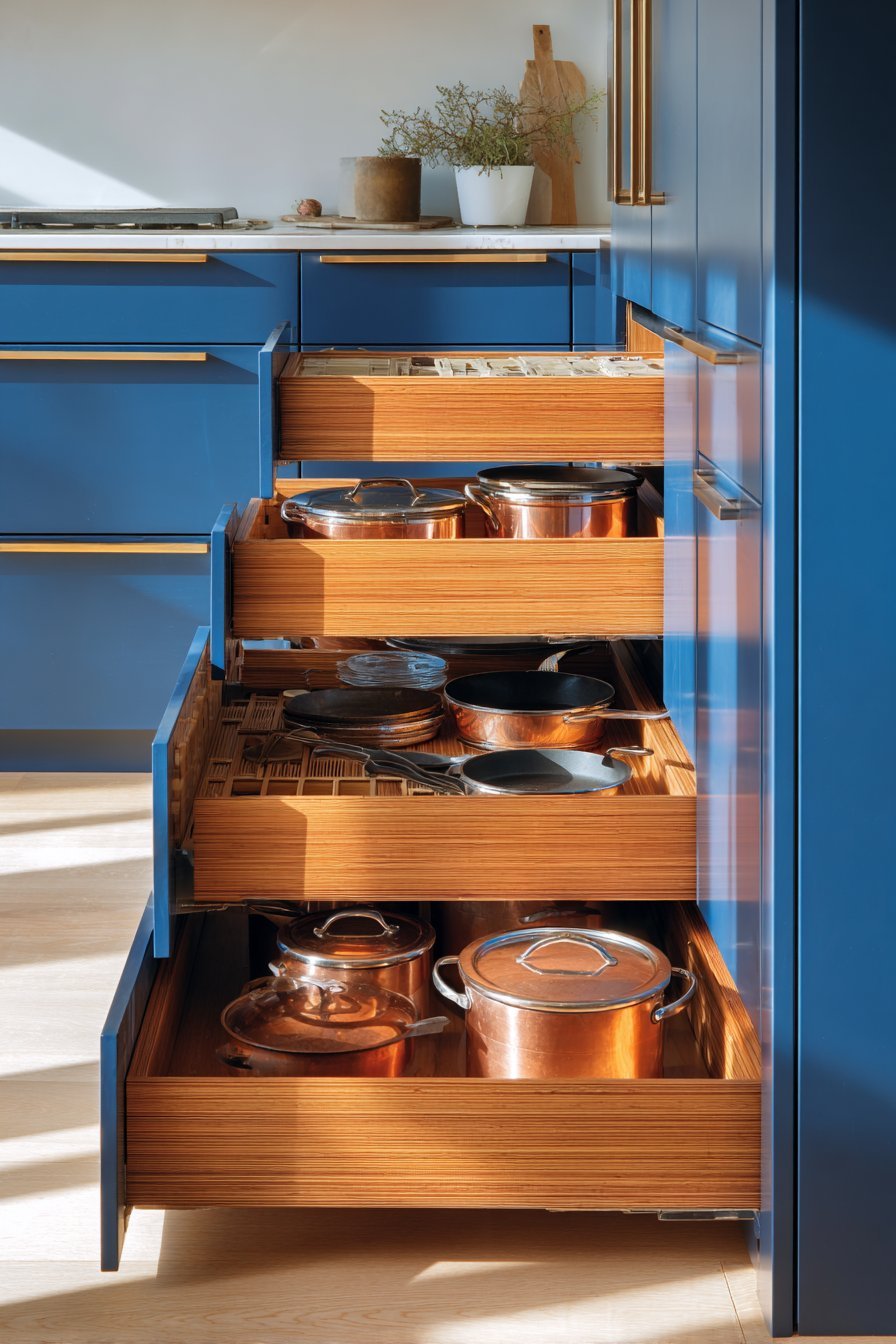
Square kitchens benefit from drawer banks that replace traditional lower cabinets along one or two walls. This configuration provides exceptional storage capacity while maintaining clean lines and modern aesthetics. Consider drawer depths ranging from 6 inches for utensils and gadgets to 12 inches or more for large pots and serving dishes, creating a varied system that accommodates your entire collection.
- Install drawers with full-extension slides rated for at least 100 pounds
- Use non-slip liners to keep items stable during drawer movement
- Incorporate drawer dividers made from bamboo or acrylic for durability
- Stack pots and pans vertically using specialized organizers to save space
- Store lids separately in dedicated vertical lid organizers
- Place heaviest items in bottom drawers to maintain stability
5. Implement Overhead Pot Racks
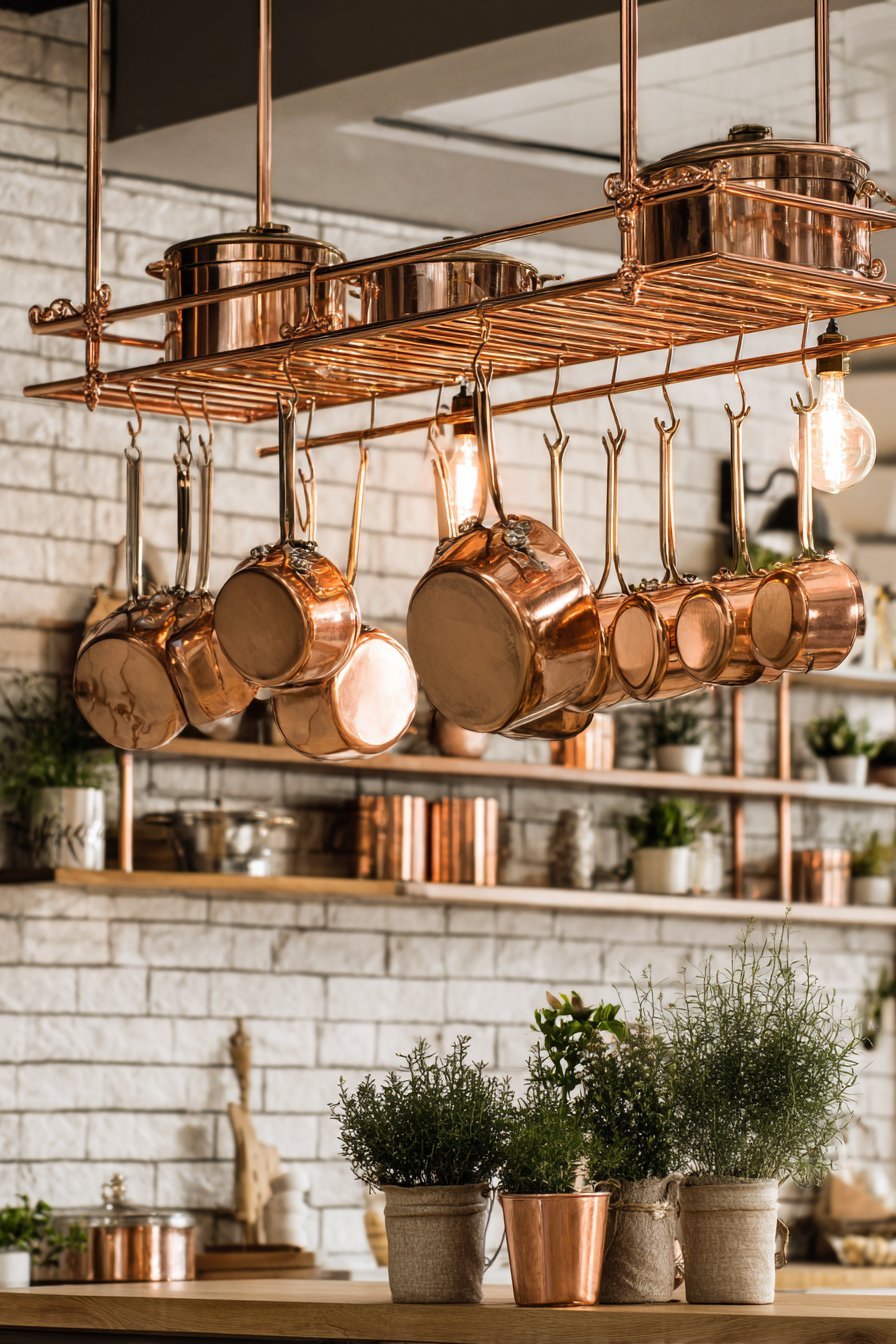
Overhead pot racks free up substantial cabinet space while keeping your most-used cookware readily accessible above work areas. These ceiling-mounted systems work particularly well in square kitchens where central space can accommodate hanging storage without impeding traffic flow. Quality pot racks support 50-100 pounds of cookware while adding architectural interest and professional kitchen character to the space.
When selecting an overhead rack, consider your ceiling height and the clearance needed for comfortable movement beneath the hanging pots. Standard installations hang 72 inches or less from the floor to prevent head bumps while maintaining easy reach for pot retrieval. Choose racks with hooks positioned around the perimeter and across the center to maximize hanging capacity for pots, pans, and frequently used utensils.
Pot racks serve double duty by providing ambient lighting when equipped with integrated lighting fixtures. This combination of storage and illumination makes them particularly valuable above kitchen islands or peninsulas in square layouts. The open storage approach also encourages keeping your cookware collection curated and in excellent condition since items remain visible rather than hidden away.
- Ensure ceiling joists can support the combined weight of rack and cookware
- Select finishes that complement other kitchen hardware and fixtures
- Hang your most beautiful and frequently used pieces for best visual impact
- Install the rack away from cooking surfaces to prevent grease accumulation
- Use S-hooks in varying sizes to accommodate different handle styles
- Consider lower-profile racks for kitchens with ceilings under 9 feet
6. Create Custom Drawer Dividers
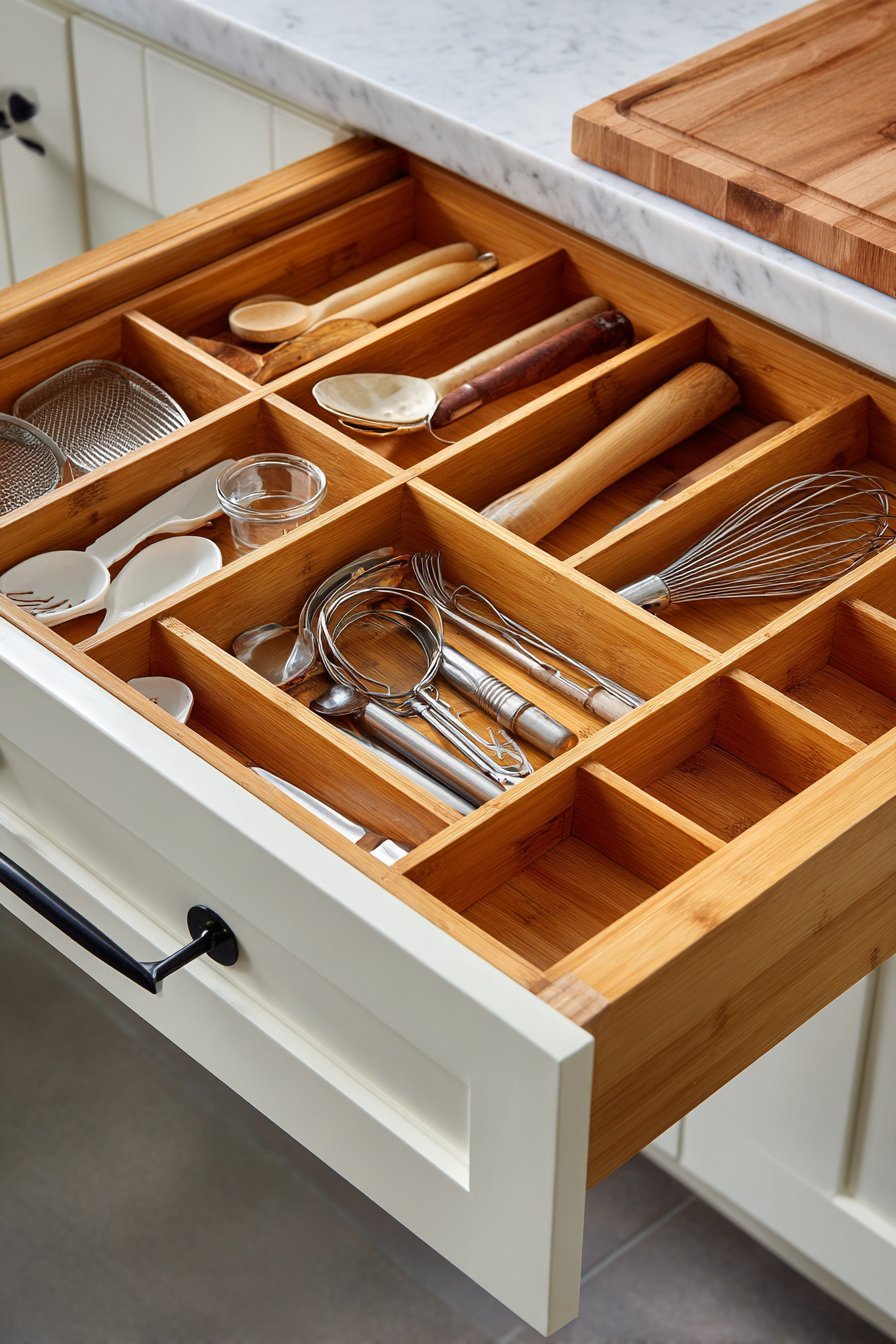
Custom drawer dividers transform chaotic catchall drawers into organized systems where every item has a designated place. Unlike pre-made organizers that rarely fit drawer dimensions perfectly, custom solutions maximize every inch of available space while accommodating your specific collection of utensils, gadgets, and tools. This personalized approach prevents wasted space and ensures items remain separated and easy to locate during cooking.
Creating custom dividers can be accomplished through several methods, from simple DIY solutions using trim boards and wood glue to professional systems featuring adjustable pegs or spring-loaded dividers. The key is measuring drawer dimensions precisely and planning compartment sizes based on the items you store most frequently. Dedicate larger sections to spatulas and serving spoons while smaller compartments hold measuring spoons and specialty tools.
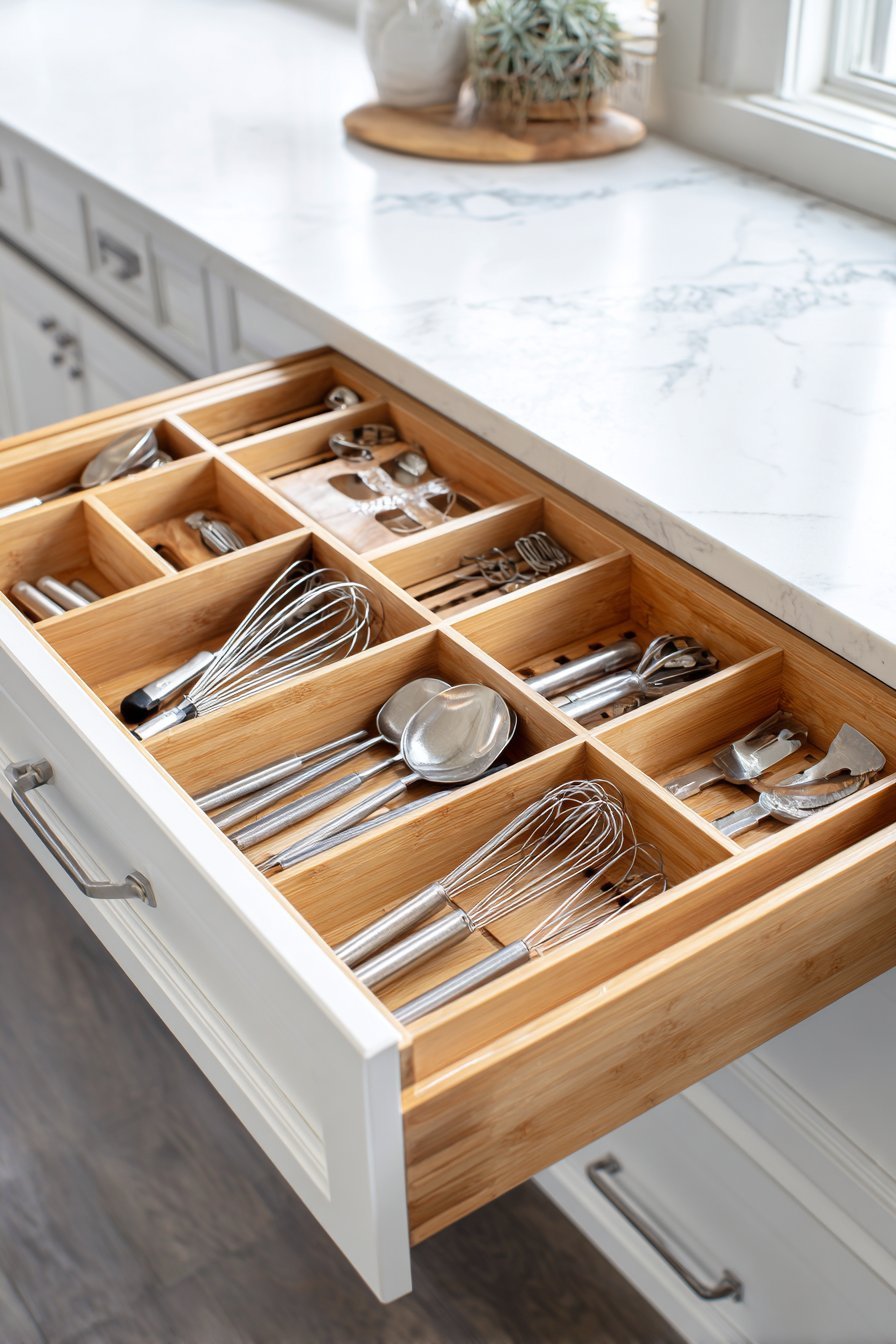
Square kitchens typically include multiple drawer sizes, allowing for specialized organization throughout the space. Shallow drawers near prep areas can house cutting tools and measuring equipment, while deeper drawers store mixing bowls and food storage containers. This zoning strategy reduces time spent searching for items and creates intuitive organization that all household members can maintain easily.
- Measure drawer interior dimensions accounting for slides and hardware
- Group similar items together in dedicated compartments
- Use bamboo or cedar for dividers to add natural antimicrobial properties
- Create adjustable systems that adapt as your needs change
- Reserve one shallow drawer specifically for frequently used items
- Install drawer dividers before organizing to prevent shifting during use
7. Install Toe-Kick Drawers
Toe-kick drawers utilize the typically wasted space beneath base cabinets, adding hidden storage for flat items like baking sheets, cutting boards, and serving platters. This 4-inch tall space runs along the bottom of standard cabinets and remains completely unused in most kitchen installations. By converting toe-kicks to functional storage, you gain several linear feet of additional capacity without impacting the kitchen’s visual design or workflow.
These shallow drawers slide out horizontally and work best for items you access occasionally rather than daily essentials. The low position makes them ideal for heavier items like cast iron griddles or large serving trays that would be cumbersome to store in overhead cabinets. Children can also access toe-kick drawers easily, making them perfect for storing kids’ dishes, placemats, or art supplies used at the kitchen table.
Installing toe-kick drawers requires professional expertise or advanced DIY skills, as the system must integrate with existing cabinetry without compromising structural integrity. When planned during initial kitchen installation, these drawers add minimal cost while providing substantial storage value. Consider adding them along the longest cabinet run in your square kitchen for maximum impact.
- Ensure adequate clearance for drawer opening without floor obstruction
- Install soft-close mechanisms to prevent damage to drawer contents
- Use these drawers for items 2 inches thick or less for best fit
- Add non-slip liners to prevent items from sliding during drawer operation
- Consider motorized push-to-open systems for toe-kick drawer convenience
- Label drawer fronts if you store items you might forget about
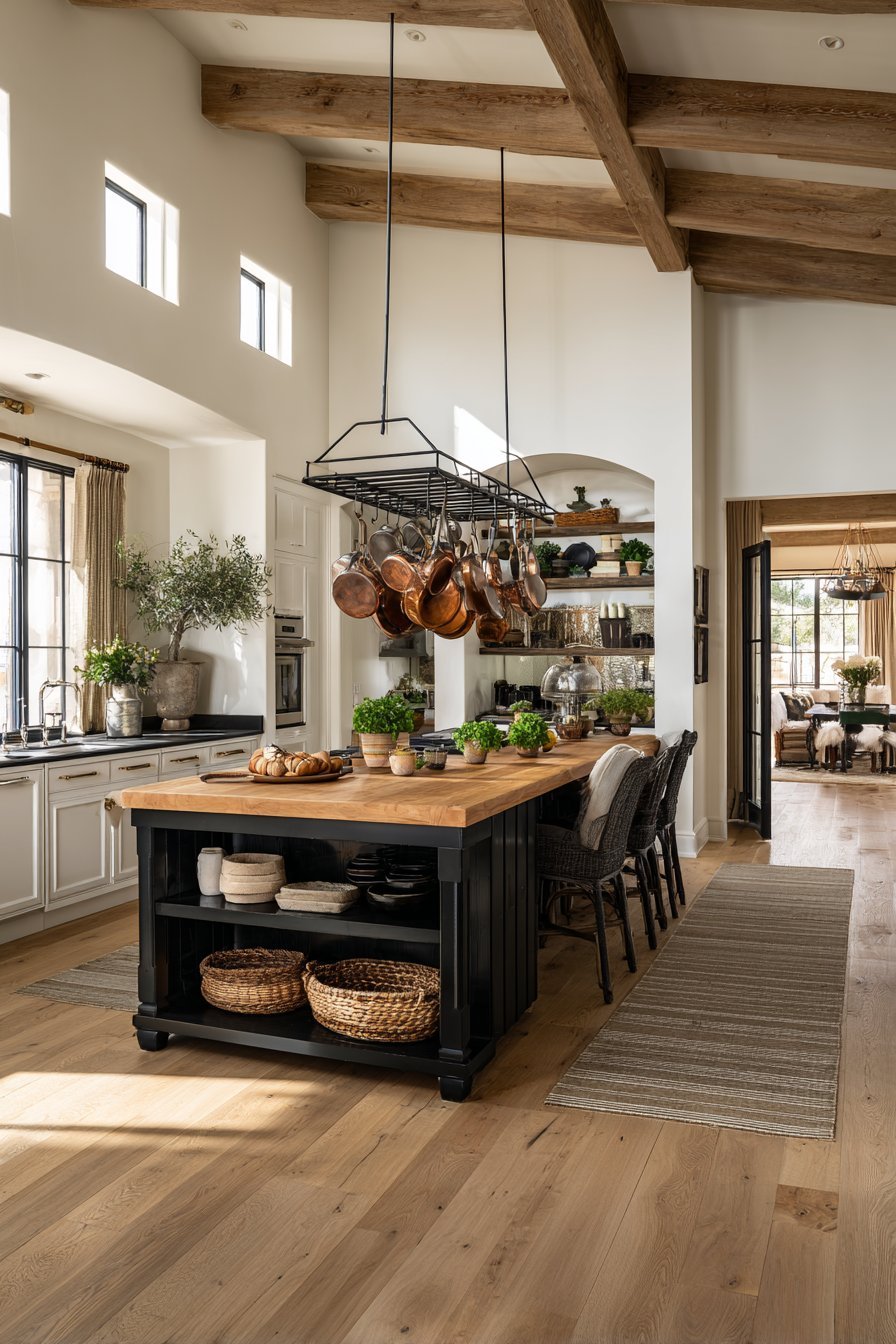
8. Maximize Island Storage Potential
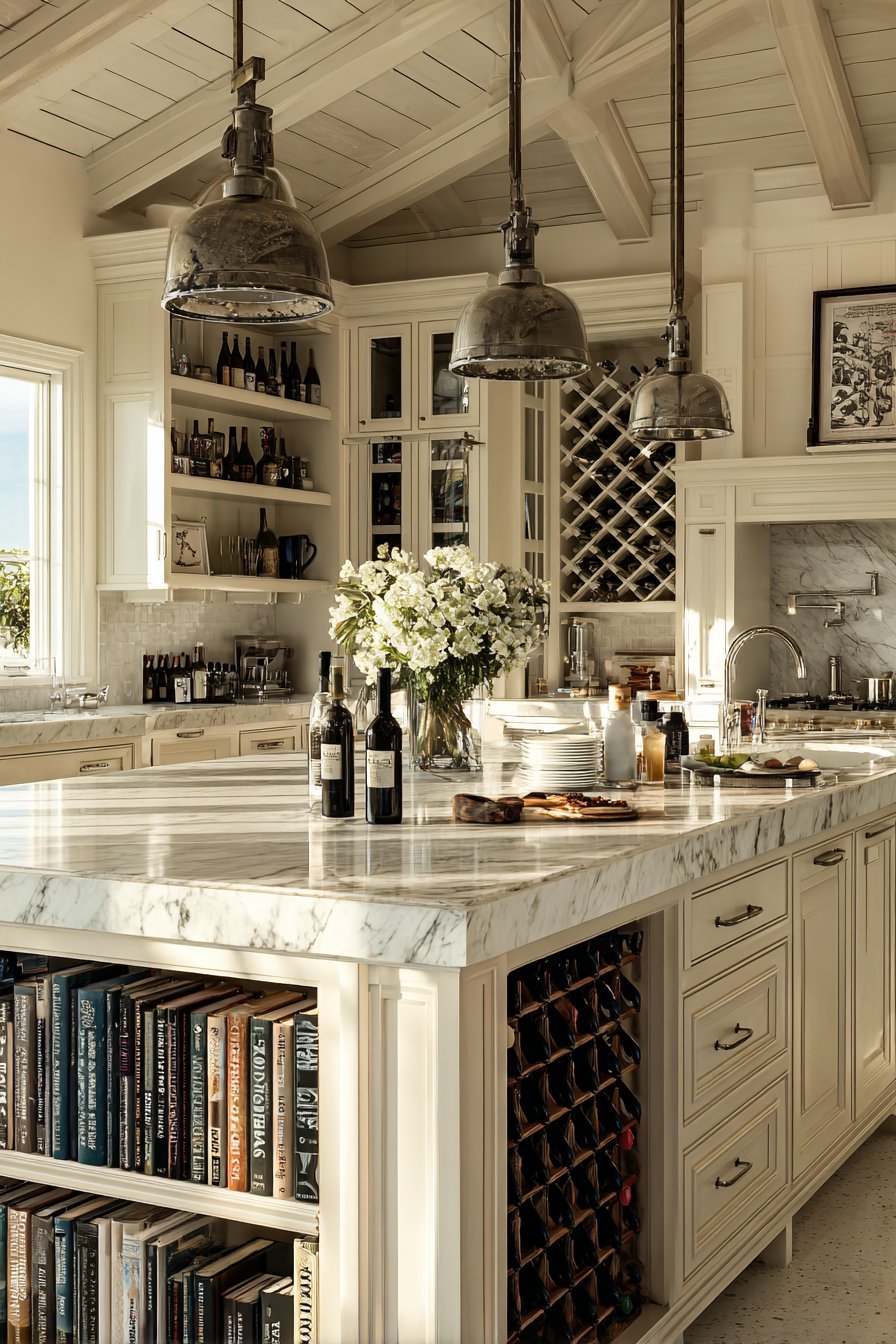
Kitchen islands in square layouts offer prime real estate for additional storage that’s accessible from multiple sides. Unlike perimeter cabinets that face one direction, island storage can incorporate cabinets, drawers, and open shelving oriented toward different work zones. This multi-directional access makes islands ideal for storing items needed throughout the cooking process, from mixing bowls and baking sheets to everyday dishes and glassware.
Deep drawers on the cooking side of your island can house pots and pans, while shallow drawers on the dining side store placemats, napkins, and flatware. Open shelving on ends accommodates cookbooks or decorative storage baskets filled with frequently used items. This varied approach maximizes the island’s storage capacity while maintaining balanced aesthetics from all viewing angles.
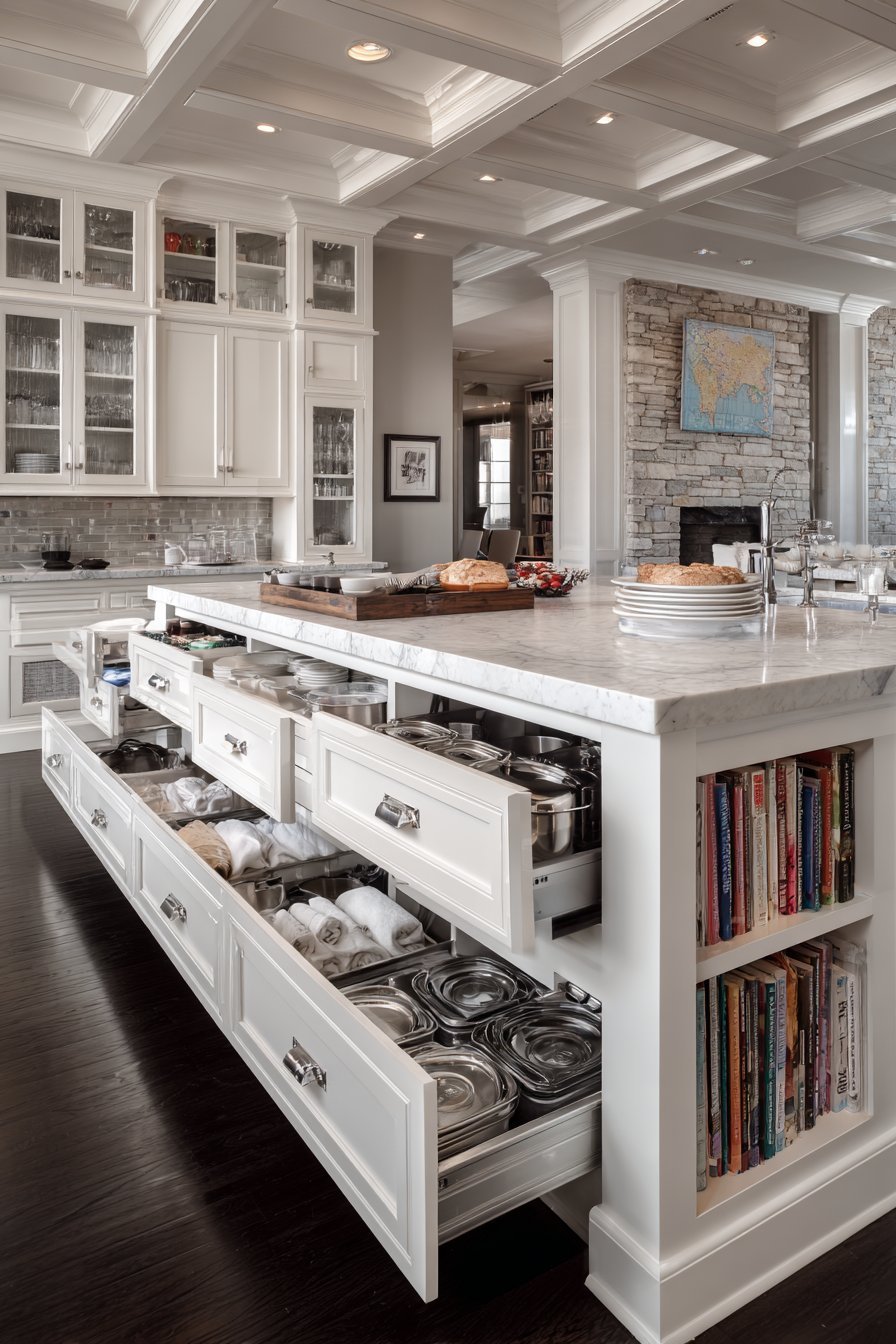
Consider incorporating specialized storage features like built-in wine racks, appliance garages, or pull-out trash and recycling bins within your island. These dedicated spaces keep the island surface clear for food preparation while ensuring essential items remain easily accessible during cooking and cleanup. For square kitchens with larger islands, consider adding storage on all four sides to create a true storage hub at the room’s center.
- Plan island storage based on which side faces different work zones
- Include at least one set of deep drawers for cookware storage
- Add electrical outlets inside drawers for charging small devices
- Install open shelving for displaying cookbooks or decorative items
- Consider a butcher block top section with storage underneath
- Include storage for at least 50% of daily-use items in the island
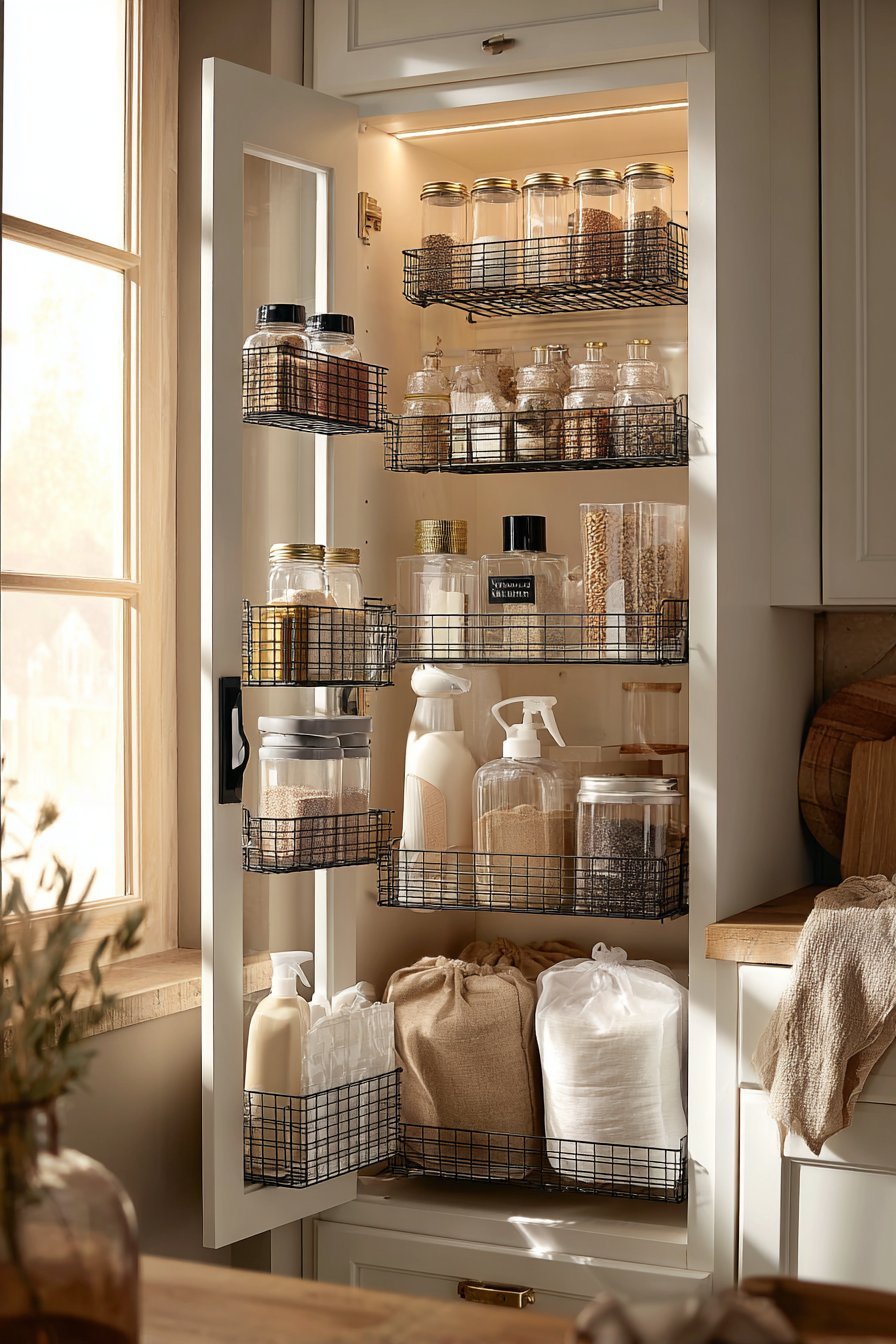
9. Use Door-Mounted Organizers
Cabinet door interiors represent overlooked storage opportunities that can hold substantial quantities of spices, cleaning supplies, and cooking utensils. Over-the-door organizers and door-mounted racks add storage without consuming valuable shelf space inside cabinets. These systems work particularly well in square kitchens where numerous cabinet doors provide multiple mounting opportunities throughout the space.
Spice rack systems mounted on upper cabinet doors keep seasonings visible and organized while freeing shelf space for larger items. Door-mounted systems on lower cabinets can hold cleaning supplies, garbage bags, or food storage lids. The key is selecting appropriately sized organizers that don’t interfere with cabinet contents when doors close, typically limiting mounted items to 2-3 inches in depth.
Consider the weight capacity of cabinet doors before installing heavy organizers, and reinforce doors if necessary with additional hinges or support brackets. Modern soft-close hinges handle moderate additional weight well, but doors laden with heavy items may require upgraded hardware. Focus on storing lightweight, frequently accessed items on door mounts to maximize convenience without compromising door integrity.
- Measure door interior dimensions before purchasing organizers
- Install door racks away from hinge sides to prevent binding
- Use clear plastic or wire organizers for better visibility
- Reserve door storage for items weighing less than 10 pounds total
- Consider magnetic strips on metal cabinet doors for knife storage
- Install organizers at comfortable eye level for easiest access
10. Incorporate Appliance Garages
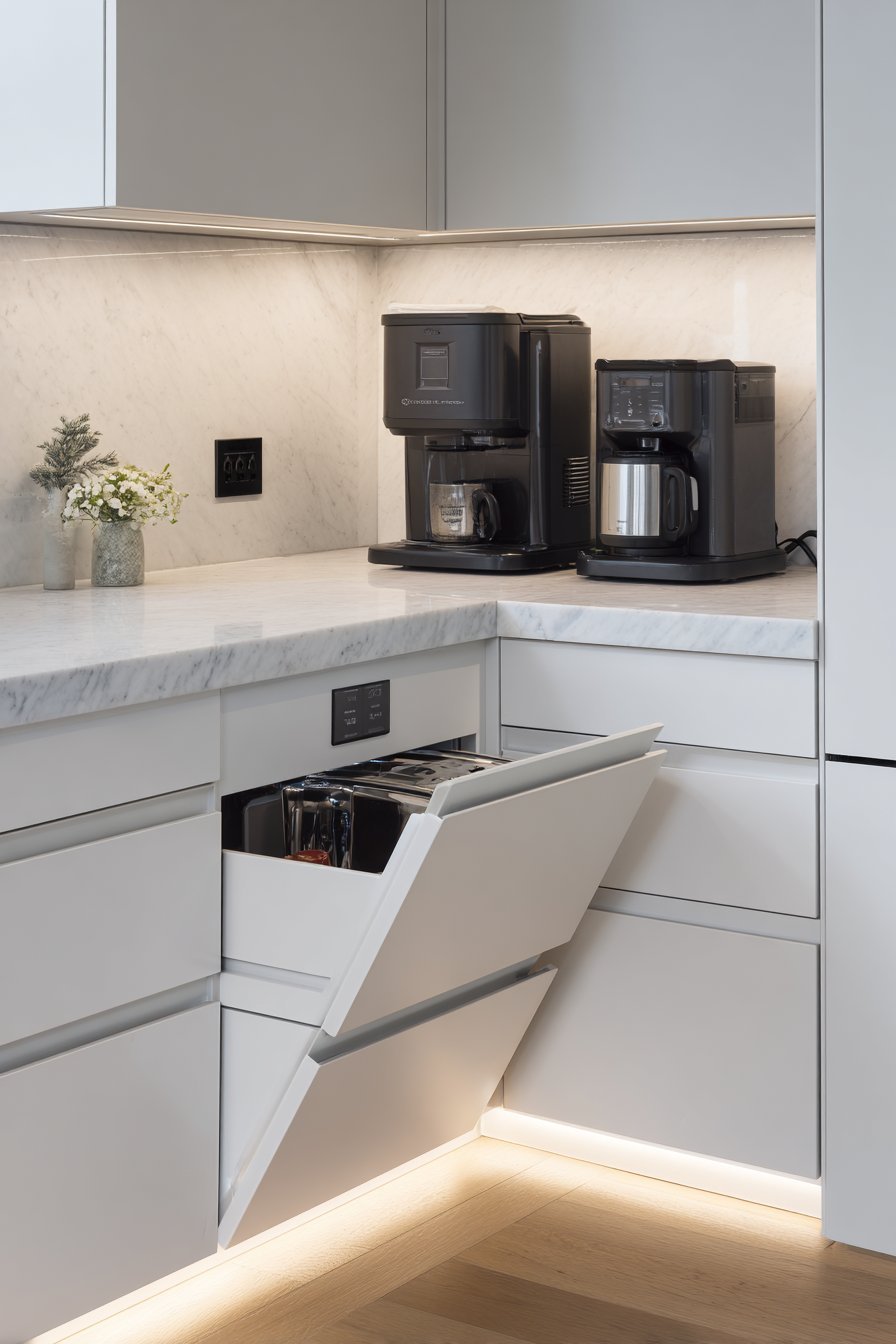
Appliance garages hide countertop clutter behind retractable or folding doors, keeping small appliances accessible while maintaining clean sightlines across your square kitchen. These dedicated spaces typically occupy corner areas or dead space at the end of counter runs, measuring 18-24 inches wide and deep enough to accommodate coffee makers, toasters, or blenders. The enclosed storage protects appliances from dust while keeping them plugged in and ready for immediate use.
Modern appliance garages feature tambour doors that roll up and disappear, bifold doors that fold back compactly, or lift-up doors with soft-close mechanisms. Choosing the right door style depends on your cabinet configuration and personal aesthetic preferences. Tambour doors work well in tight spaces where swing-out doors would interfere with workflow, while lift-up doors create a contemporary look.
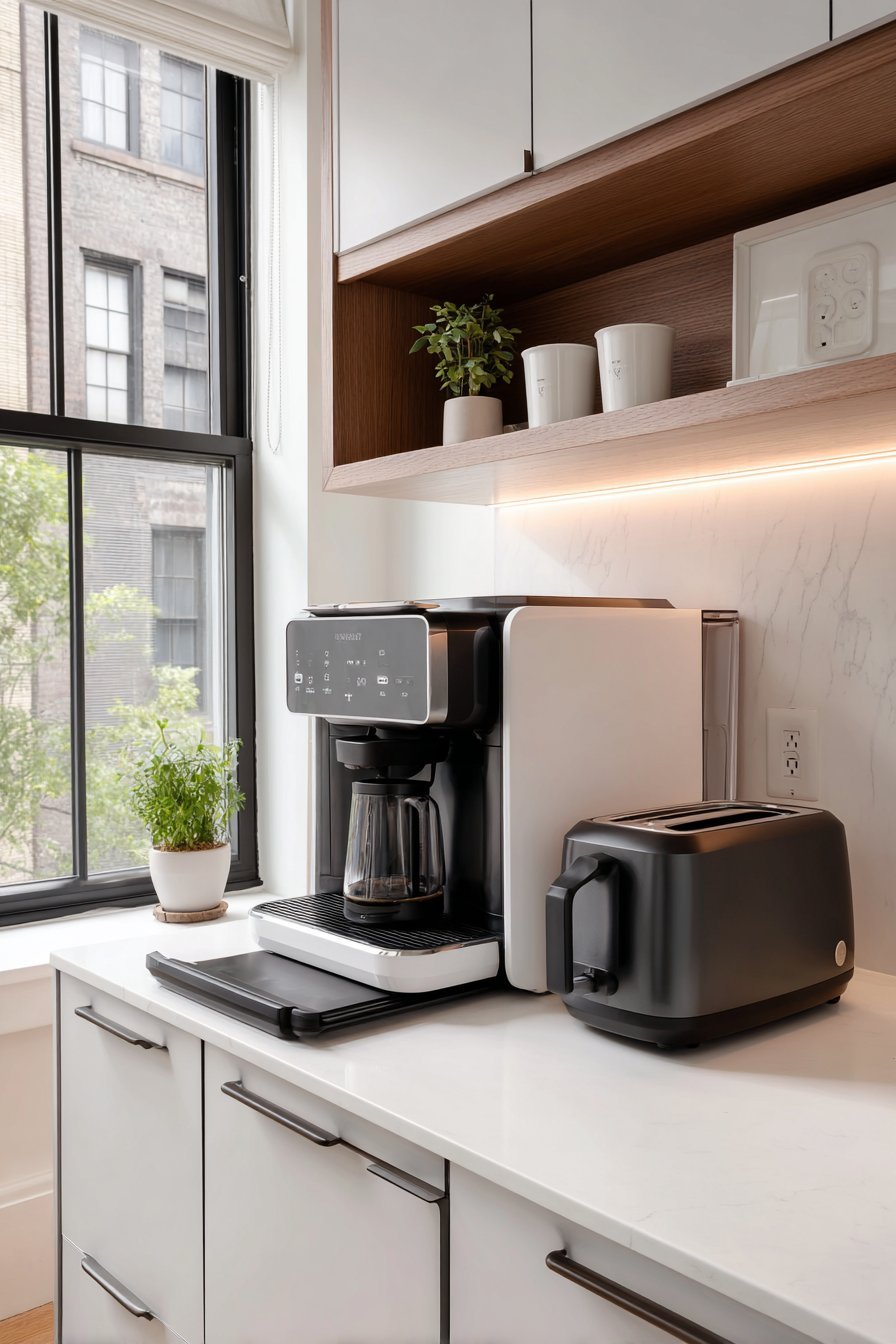
Planning appliance garage locations requires careful consideration of electrical outlet placement and typical workflow patterns. Position garages near coffee stations or breakfast prep areas for morning efficiency, or create a baking zone with stand mixers and food processors stored at counter level. This strategic placement reduces time spent retrieving and returning appliances while keeping counters clear for actual food preparation.
- Install electrical outlets inside appliance garages for permanent plugging
- Allow 4-6 inches of clearance above appliances for proper ventilation
- Use appliance garages for daily-use items only to maximize convenience
- Consider pull-out shelves inside garages for easier appliance access
- Match garage door style to surrounding cabinet finishes for cohesion
- Plan garage locations away from wet zones to protect electrical connections
Conclusion
Maximizing storage in a square kitchen layout requires strategic planning and creative thinking about how to use every available inch effectively. By implementing these ten proven strategies—from floor-to-ceiling cabinetry and optimized corner solutions to appliance garages and door-mounted organizers—you can transform even compact square kitchens into highly functional spaces that accommodate all your cooking equipment, pantry staples, and serving essentials without feeling cramped or cluttered.
The key to success lies in combining multiple storage solutions that work together as a cohesive system rather than relying on any single approach. Assess your specific storage needs, prioritize items you use most frequently, and select solutions that align with your budget and skill level. Remember that effective storage isn’t about cramming more items into your kitchen—it’s about creating organized systems that make cooking more enjoyable and efficient. Start with one or two high-impact changes and gradually implement additional solutions as you discover what works best for your household’s unique needs and cooking habits.